After nearly 8 years of waiting and countless number of teasers, NoLimits 2 was officially released on January 10, 2014. After playing around with the simulator for quite a few hours and learning all of the new features, I decided to write a review. Warning you now, this is going to be quite lengthy.
Tech Specs
Let’s start with all of the technical stuff. Here are the specs for the minimum and recommended computer to play NoLimits 2.
Minimum Requirements:Windows XP (SP 3) or later, 2.0 GHz Dual Core with 2 GB RAM, Fully compatible to Direct X 9.0c (Shader Model 3) with 512 MB Video RAM
Recommended Requirements: Windows 7 or newer, 2.6 GHz Quad Core with 4 GB RAM, Fully compatible to Direct X 9.0c (Shader Model 3) with 1 GB Video RAM
Here are the specs of the computer I used to achieve the graphic quality you see in the images below.
- CPU: Intel Xeon Quad-Core E3-1230 V2 @ 3.3GHz
- RAM: 16GB
- GPU: Nvidia GeForce 670 with 2GB VRAM
- OS: Windows 8.1
Now you don’t need a high-end gaming computer like mine to get a high graphics quality, but if you want to push the simulator to its limits, a mid-to-high end computer is highly recommend. From the reports I’ve been hearing about the various computers that people are installing these on, there are a few things I recommend.
- Low-end laptop hardware will not run as well as desktop hardware, but high-end laptops can run it just as well as a desktop.
- Integrated graphic cards like those from Intel or AMD may not perform very well due to the limited resources they have. A dedicated graphics processor, like a Nvidia GeForce or AMD Radeon graphics card is recommended.
- A quad-core processor is recommended, especially if you want to record video. You can get by with a high-end dual core processor, like an Intel i3, but is not ideal for recording video.
- There is a Mac version in development with an unknown release date, but for now, Boot Camp with Windows is recommended.
- Doesn’t list it in the specs, but at least 2GB of empty hard drive space is recommended, more if you’re planning on recording videos.
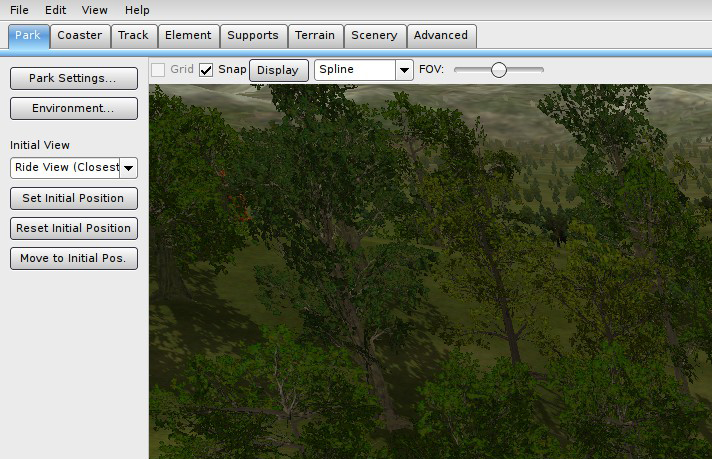
The Editor
Those who used NoLimits 1 before, throw out everything you remember about it. This time around, everything is rolled into one program, the track editor, simulator, and terrain editor. I’m going to start with the editor and what’s changed in that. I used a couple of the included coasters for reference as the demo is only limited to saving a coaster with 10 track vertexes.
The first time I went into the editor, I was completely shocked how it looked. Gone are the old Windows-styled buttons, replaced with a sleek custom UI with everything separated within tabs. In order to create a new coaster, you must first create a new park, which this is what makes it possible to build more than one coaster in an area.
After you create a park, you can then move on to create your first coaster, or import a coaster from a NoLimits 1 file. There are 37 different type of coasters to pick from, everything from the classic Arrow Suspended coaster all the way up to a S&S 4th Dimension coaster. The demo is unfortunately limited to 4 types: Schwarzkopf classic looping trains, Timberliners, B&M Hyper V-trains, and the B&M Dive coaster, but everything else is mainly full featured.
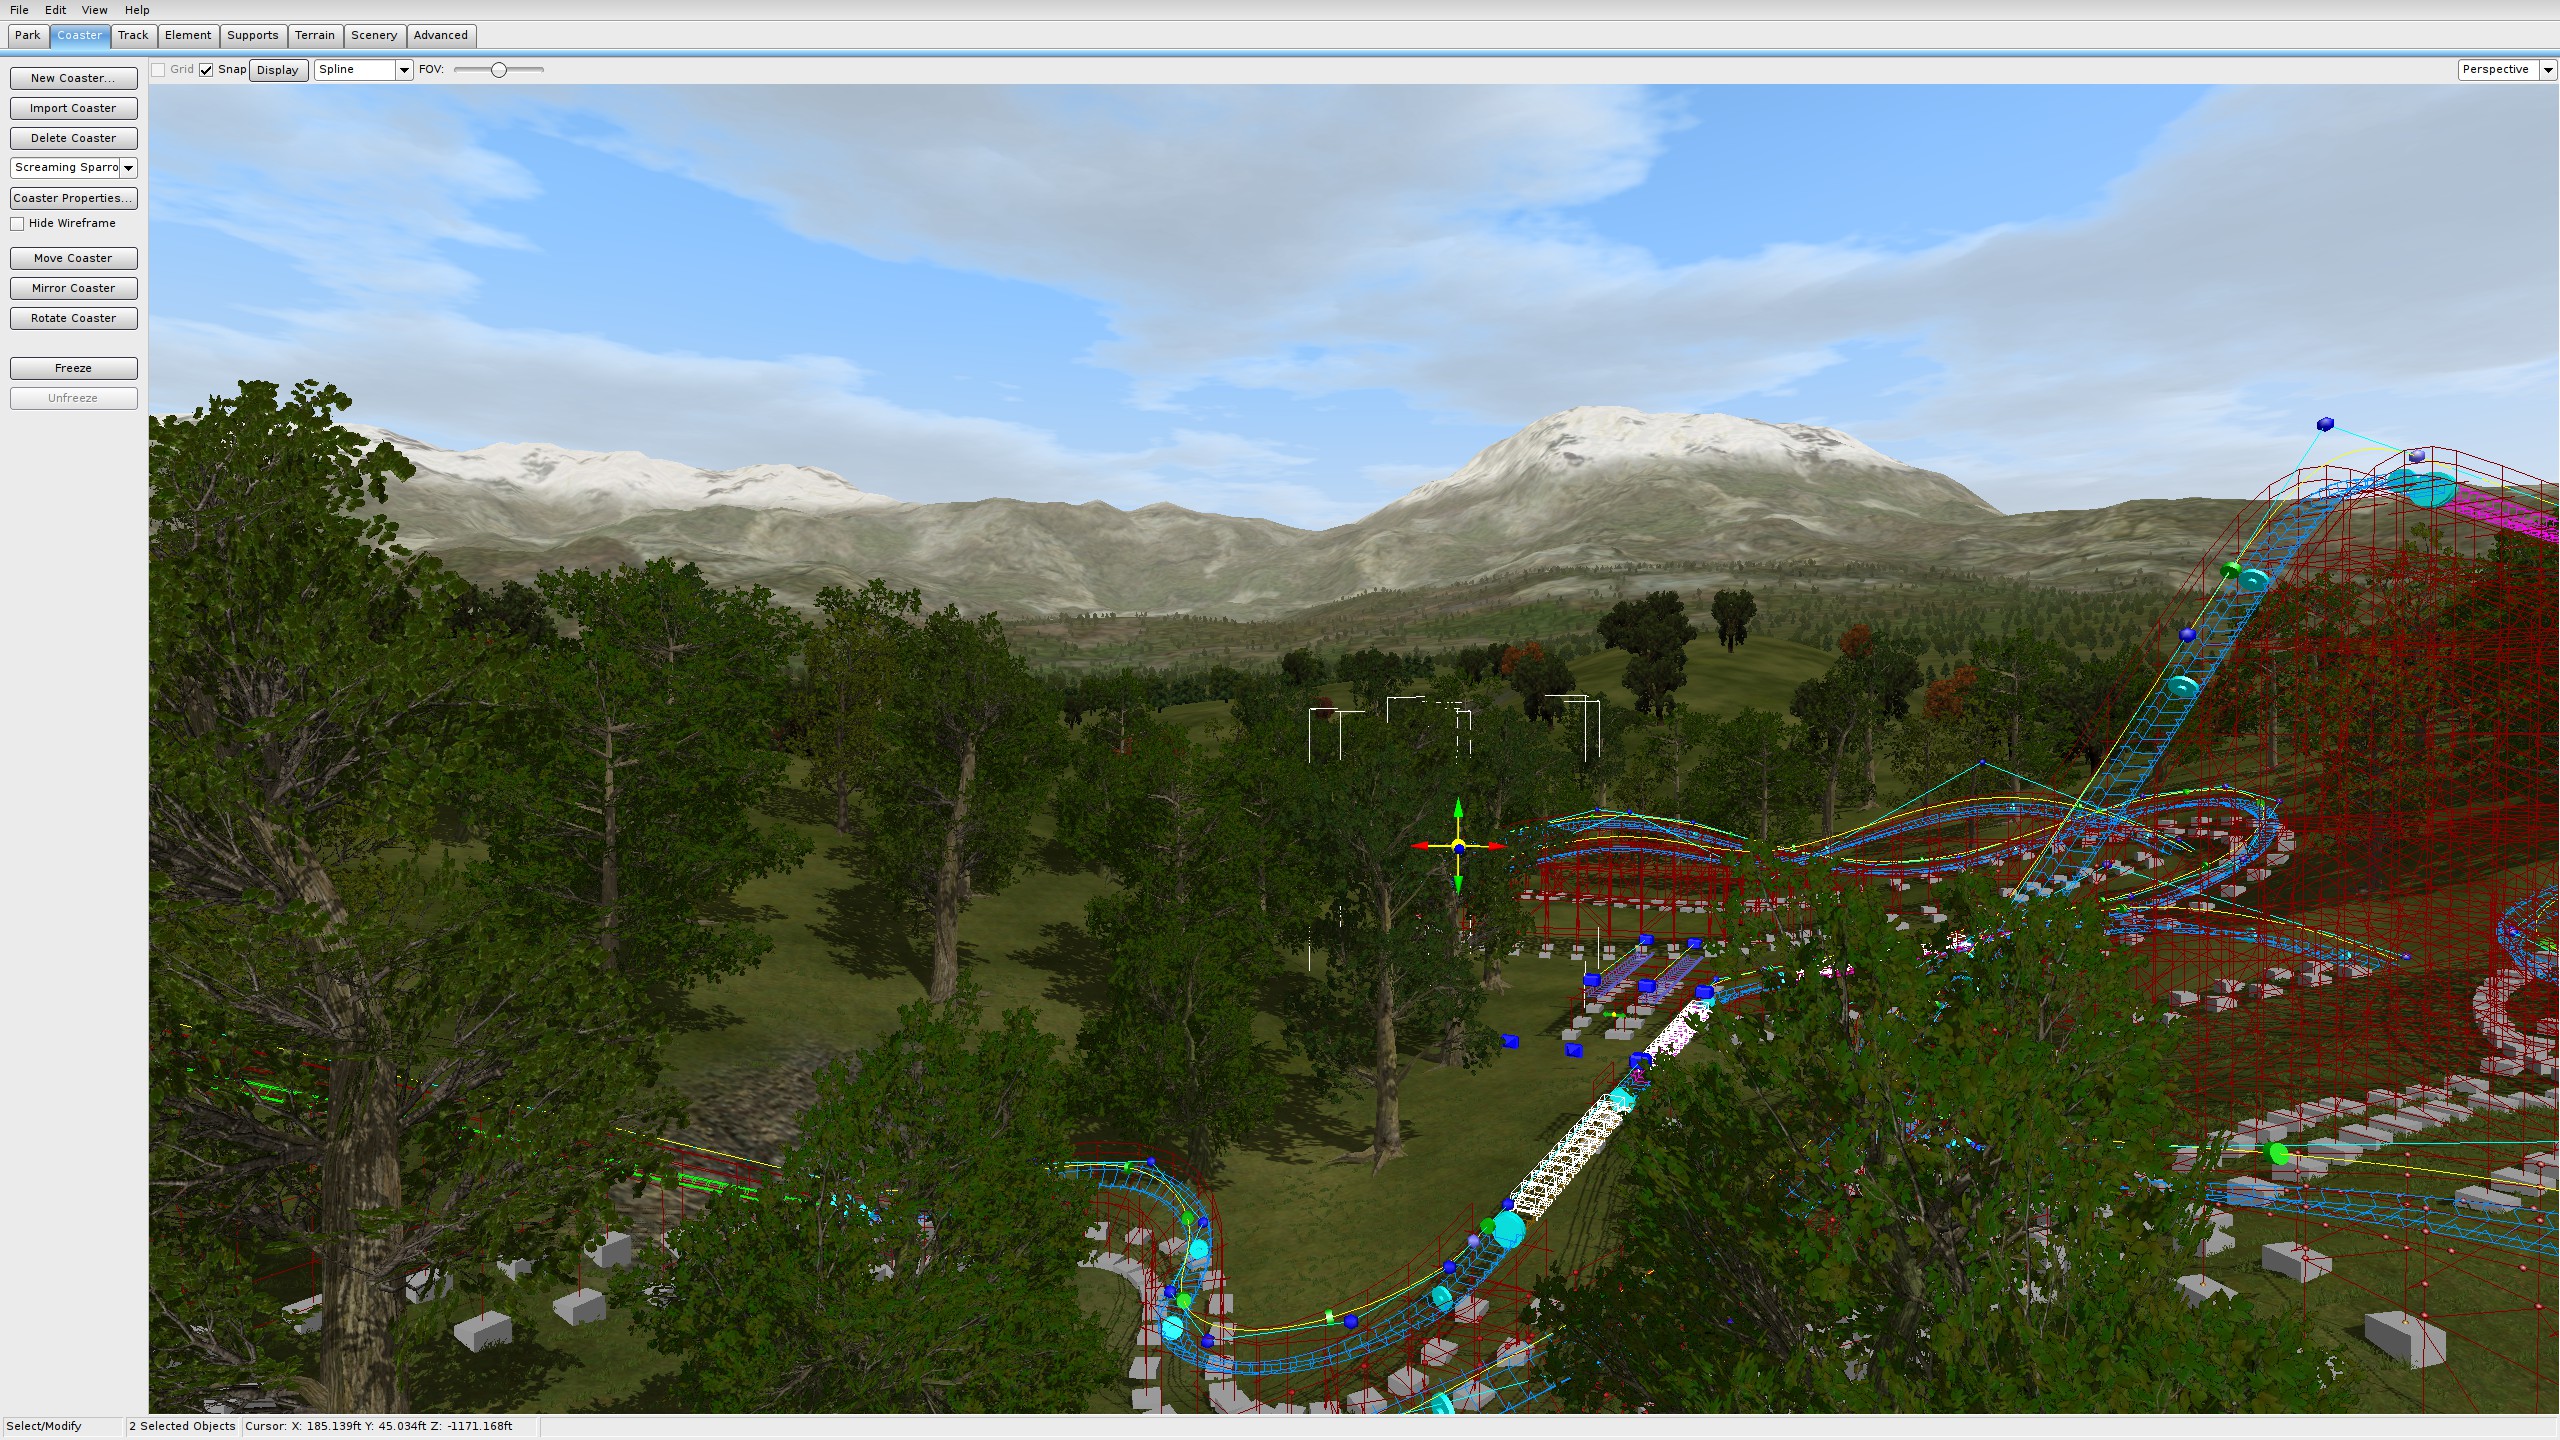
The vertex system used in NL1 has been thrown out and a new weighted-type system has been introduced. This type of system makes curving tracks much easier, but does require some getting used to. In the second image below, you can see that there are a few different styles of nodes, which I’ll just explain these basic ones. 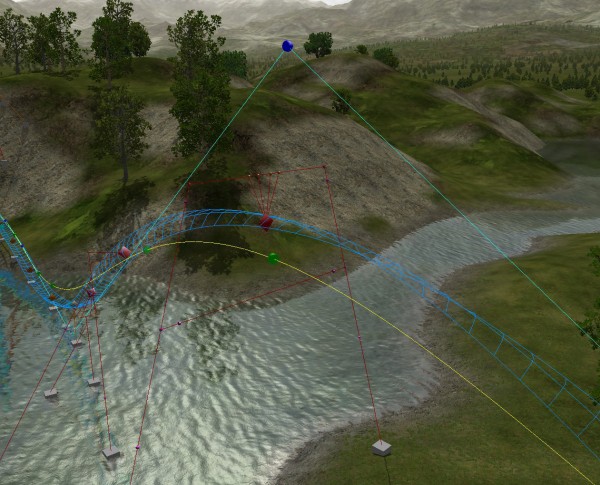
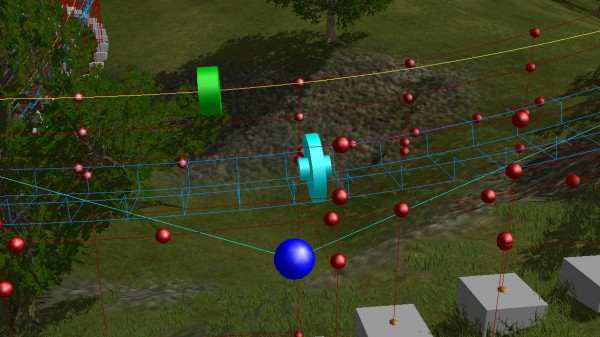 The dark blue sphere is the track adjustment vertex, which determines the curve and direction the track will go. The green cylinder is the track roll node, which determines the angle the track will be banked at. There is also an auto-bank button that will automatically calculate the banking for a turn at the estimated speed. The light blue disk shaped object is a track separator. That can be used to separate the the type of track along the course of the coaster, like a lift, or brake section.
You can adjust the track using a fan-mode, which will help curve out a track so it doesn’t end up with deadly forces. You can also add special tracks, which can either be used to transfer trains onto storage tracks, or to switch tracks for a dual-station.
In the editor, details can be added such as trees or fog, and adjust the terrain and “paint” grass, dirt, or rocks in the areas where you want. The terrain editor is fairly straightforward, add nodes to the terrain and sculpt yourself a hill or a mountain, or carve out a hole for a lake or valley. Tunnels are also auto-generated, so you can go underground as much as you want your coaster to go!
After you get your coaster the way you want it, you can view the coaster in its simulator view without having to leave the editor. Helps to tweak it here and there without having to go back and forth between the editor and simulator. 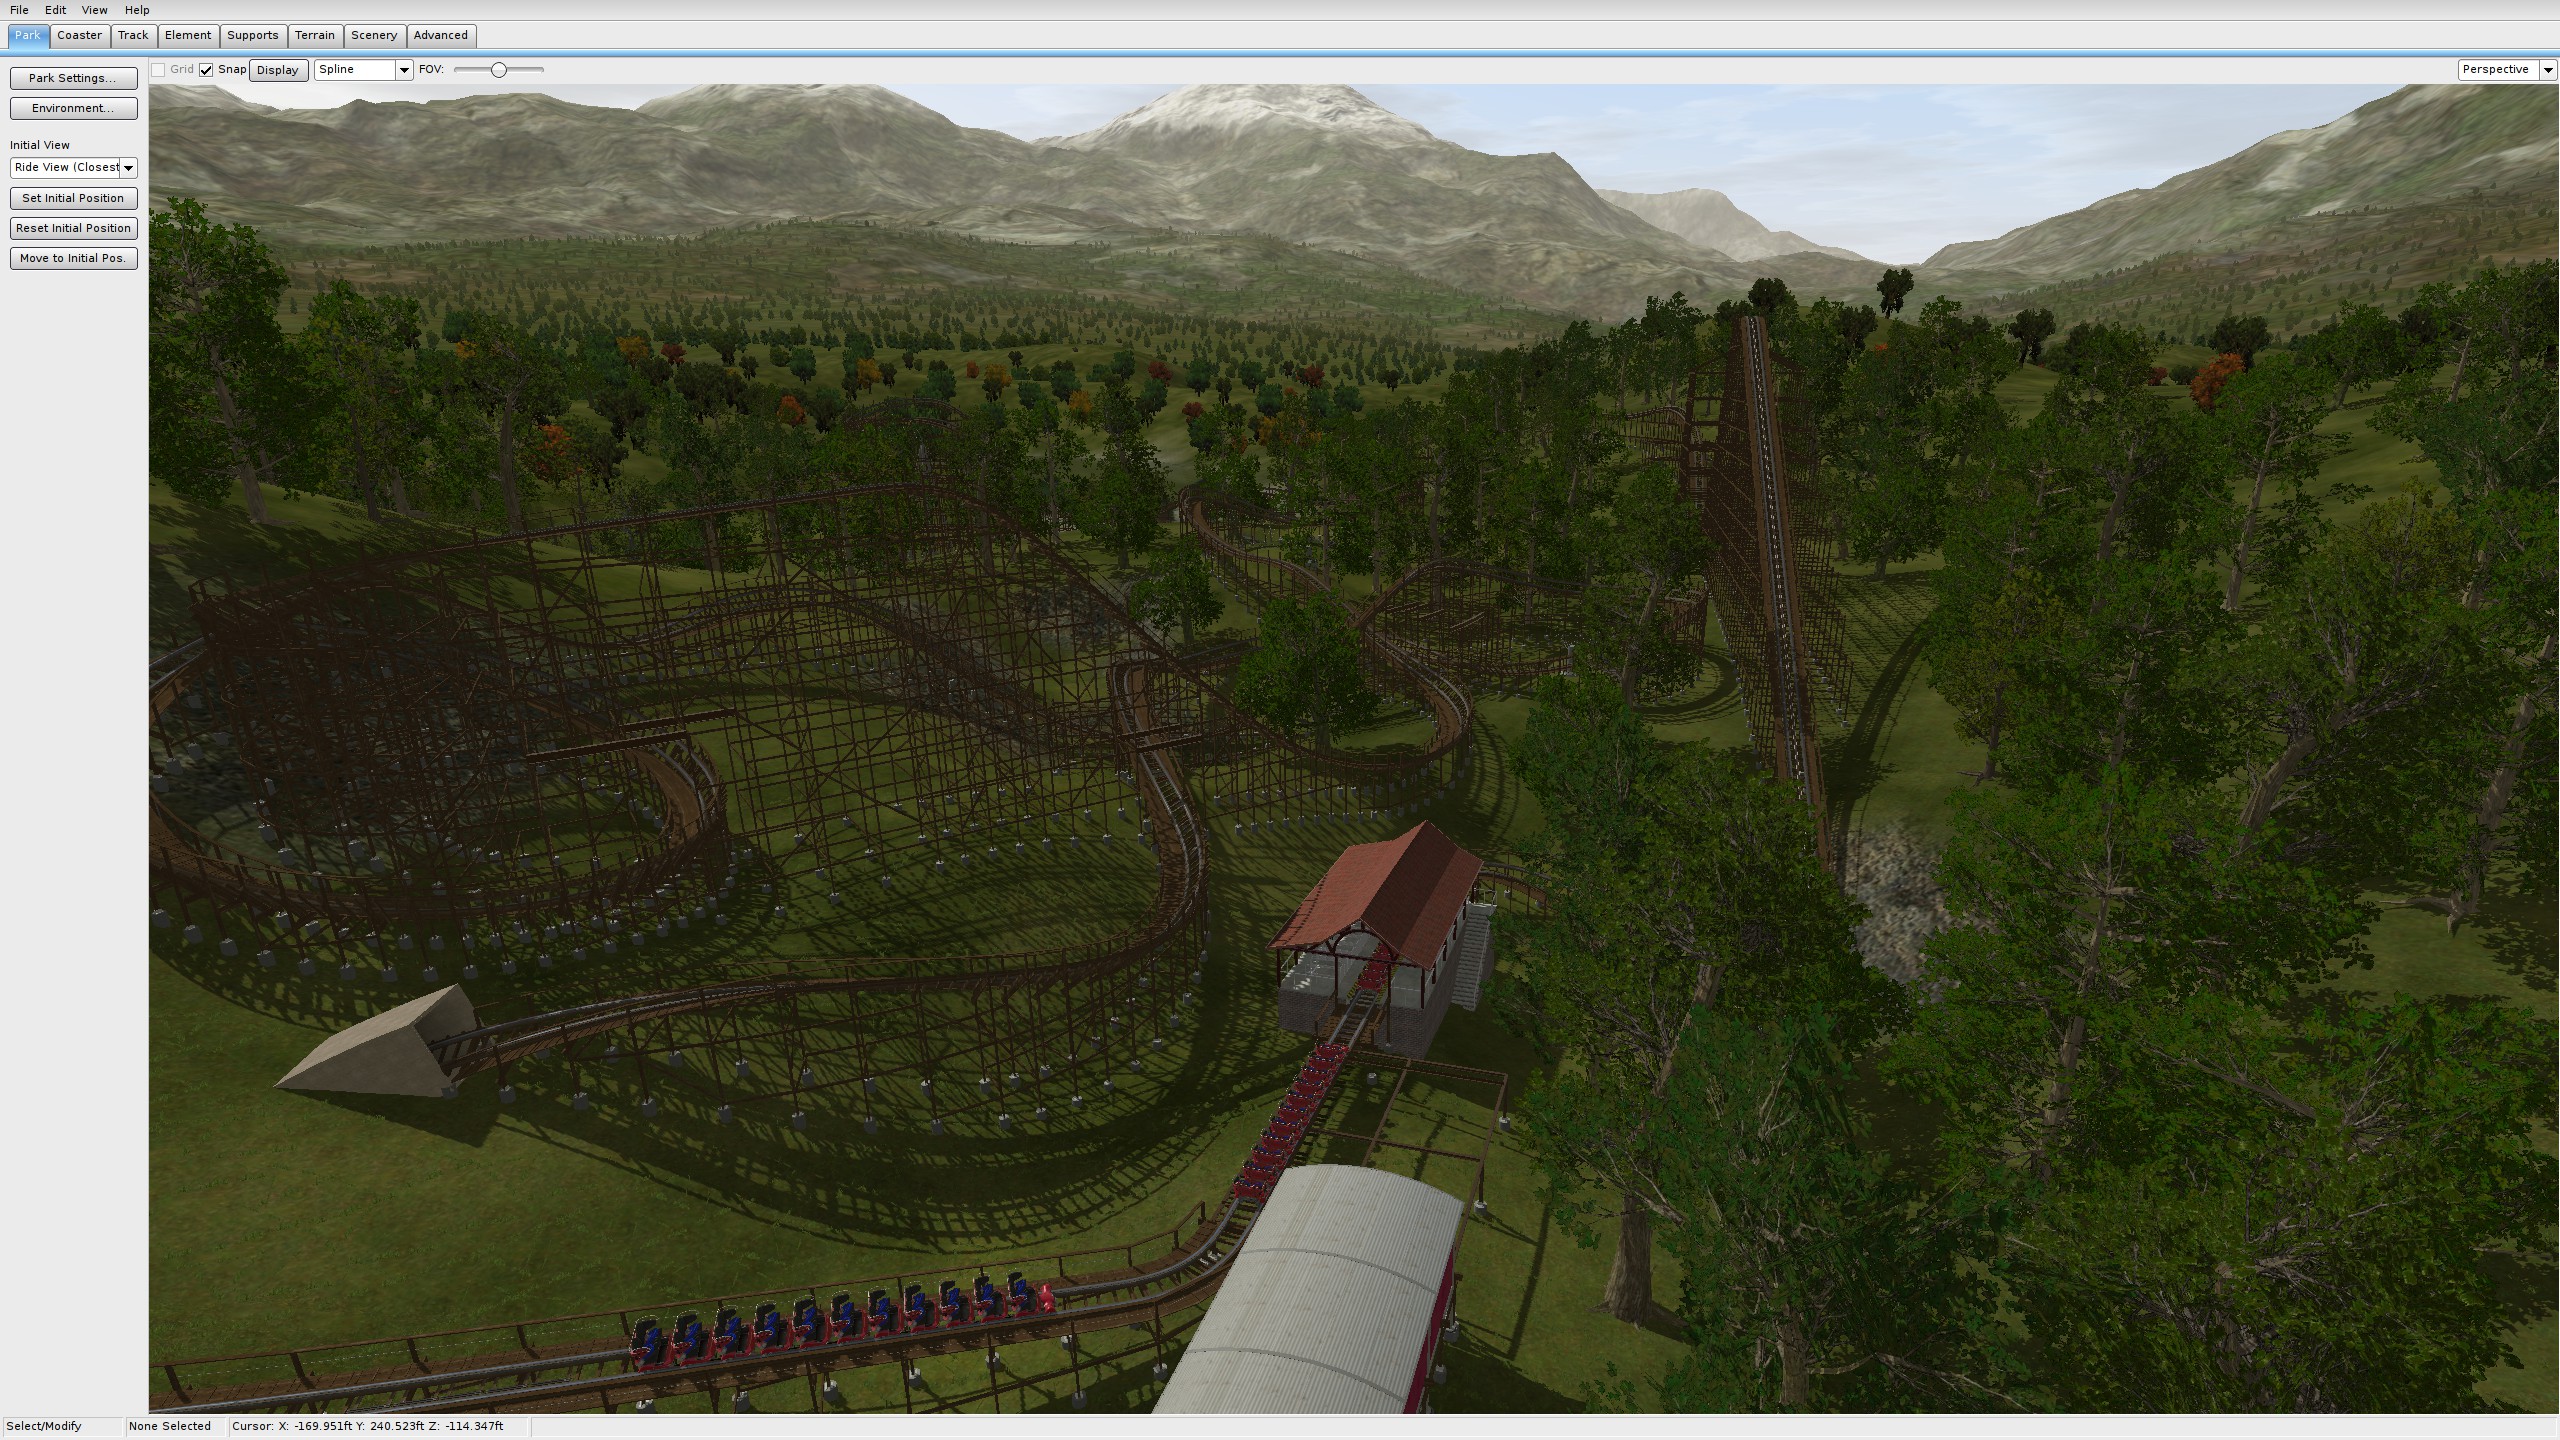
The Simulator
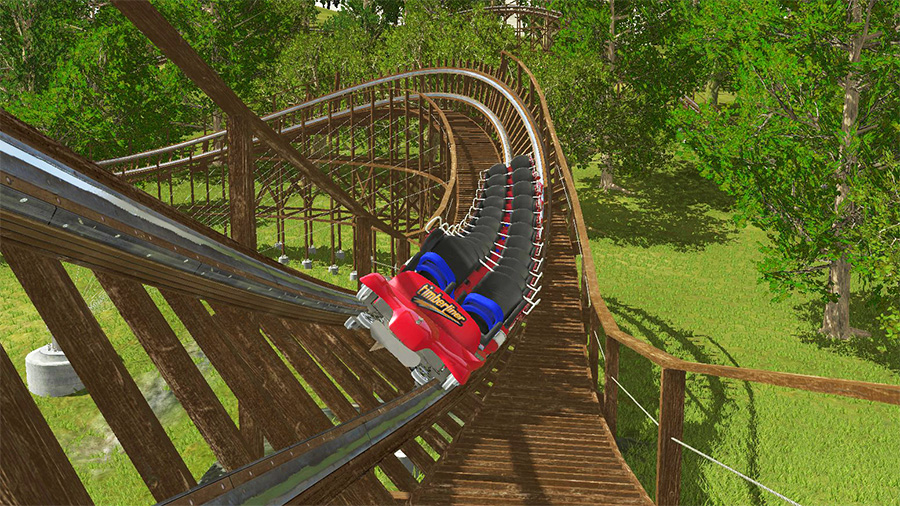
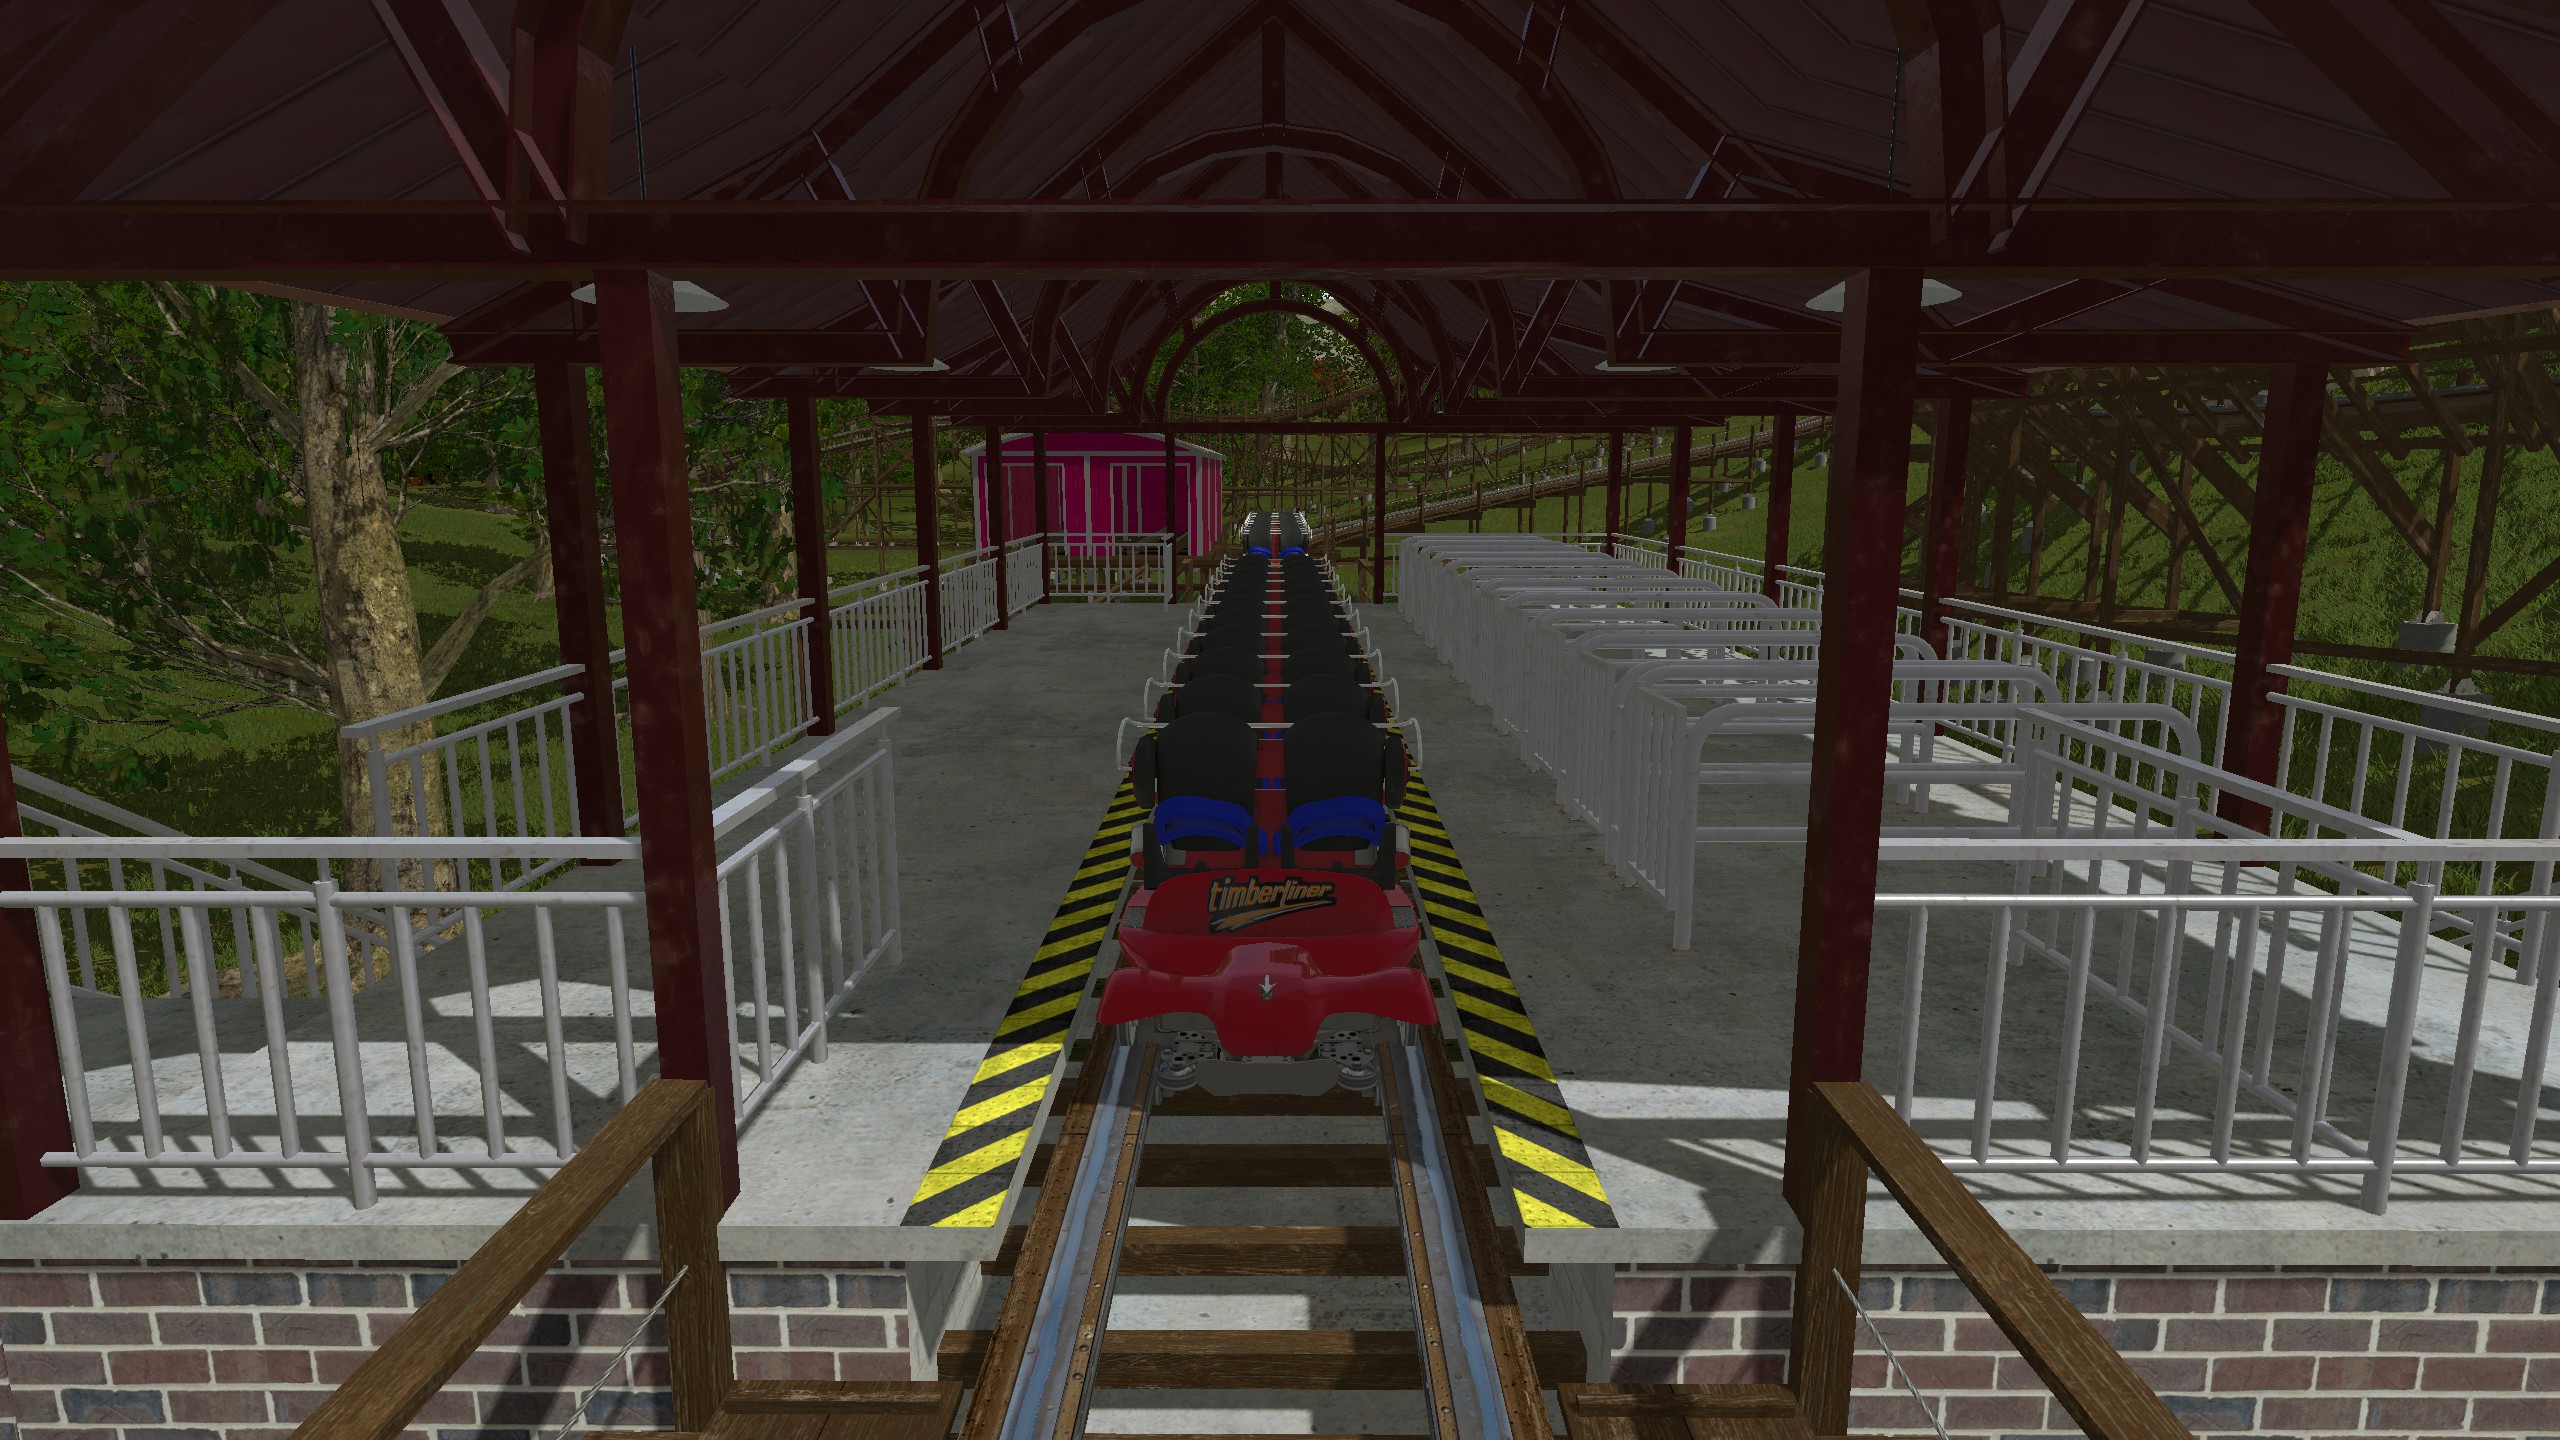
Out of everything, this is probably the most familiar to those that have used NL1. The graphics engine has been overhauled and rivals many modern gaming engines, hence why a decent computer is needed. Everything has a realistic feel to it, from the station, track, supports, all the way down to the trains. The nighttime lighting is very cool, but it can bog down a computer if it doesn’t have enough graphics power.
The stations look very much like they do in real life. Only thing that’s missing is a control booth, but wouldn’t be surprised if that’s added at a later date.
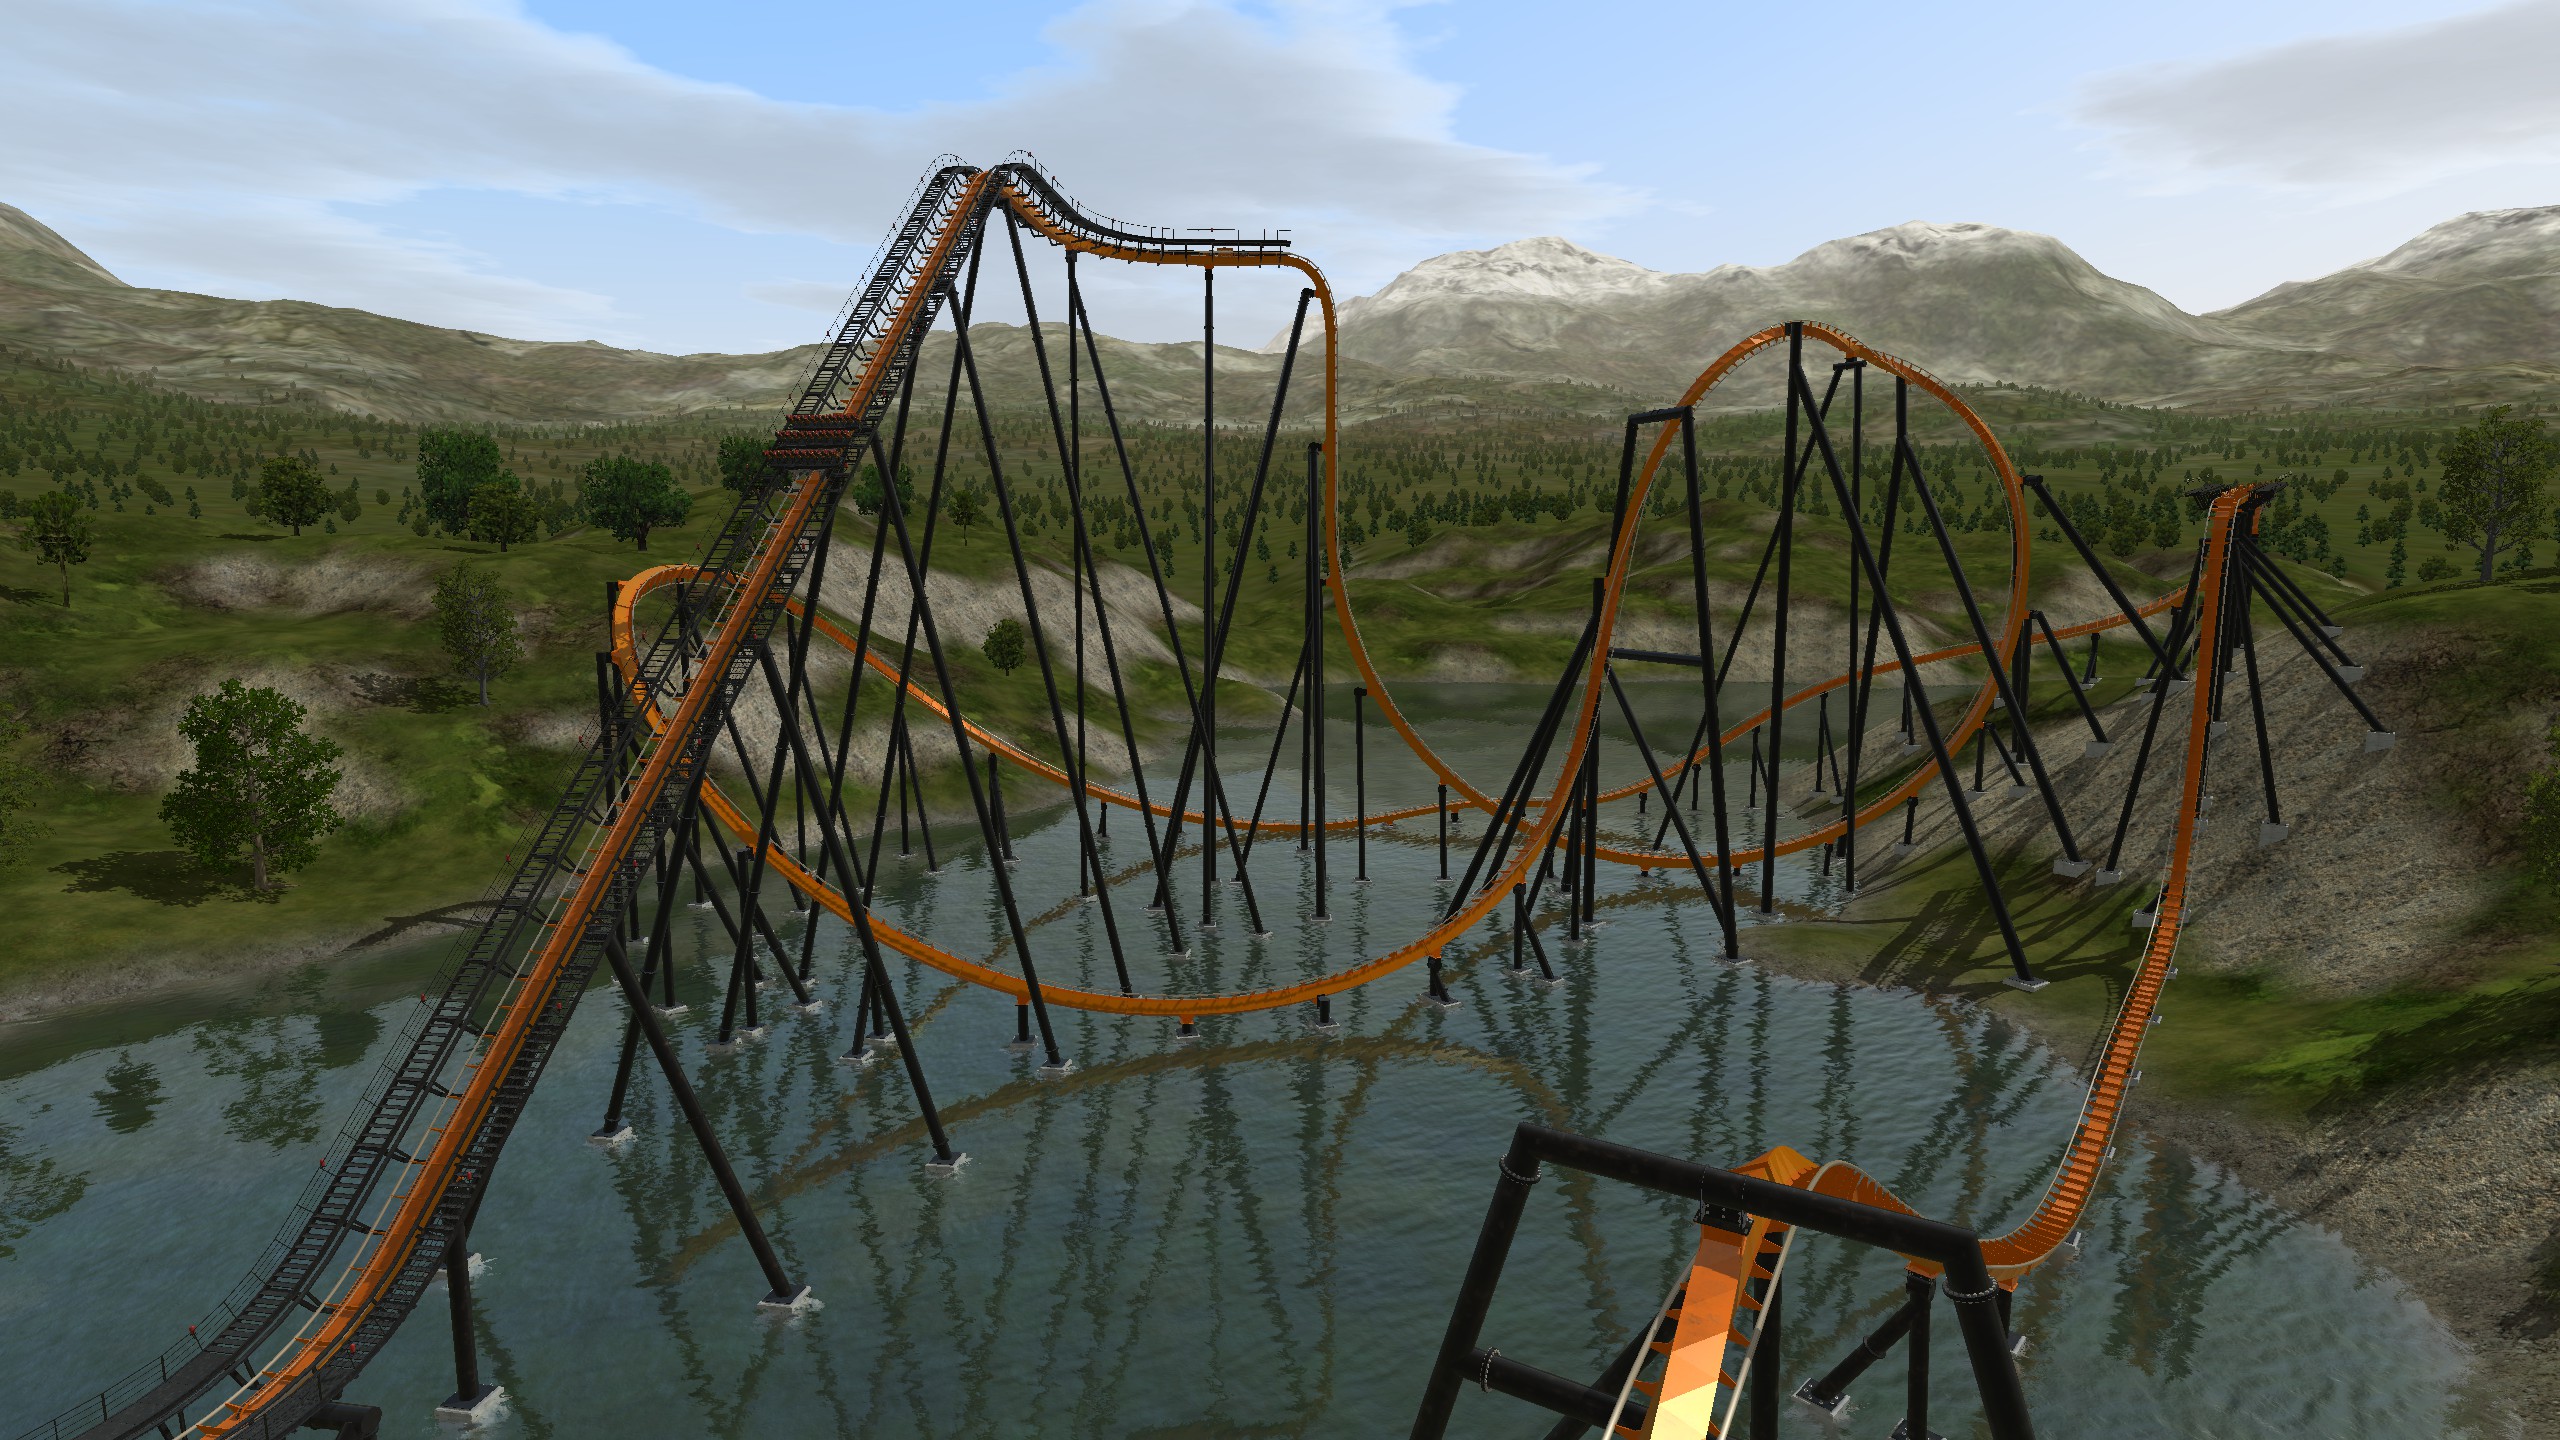
The water reflections are very life-like, refracting and reflecting light much like real water would.
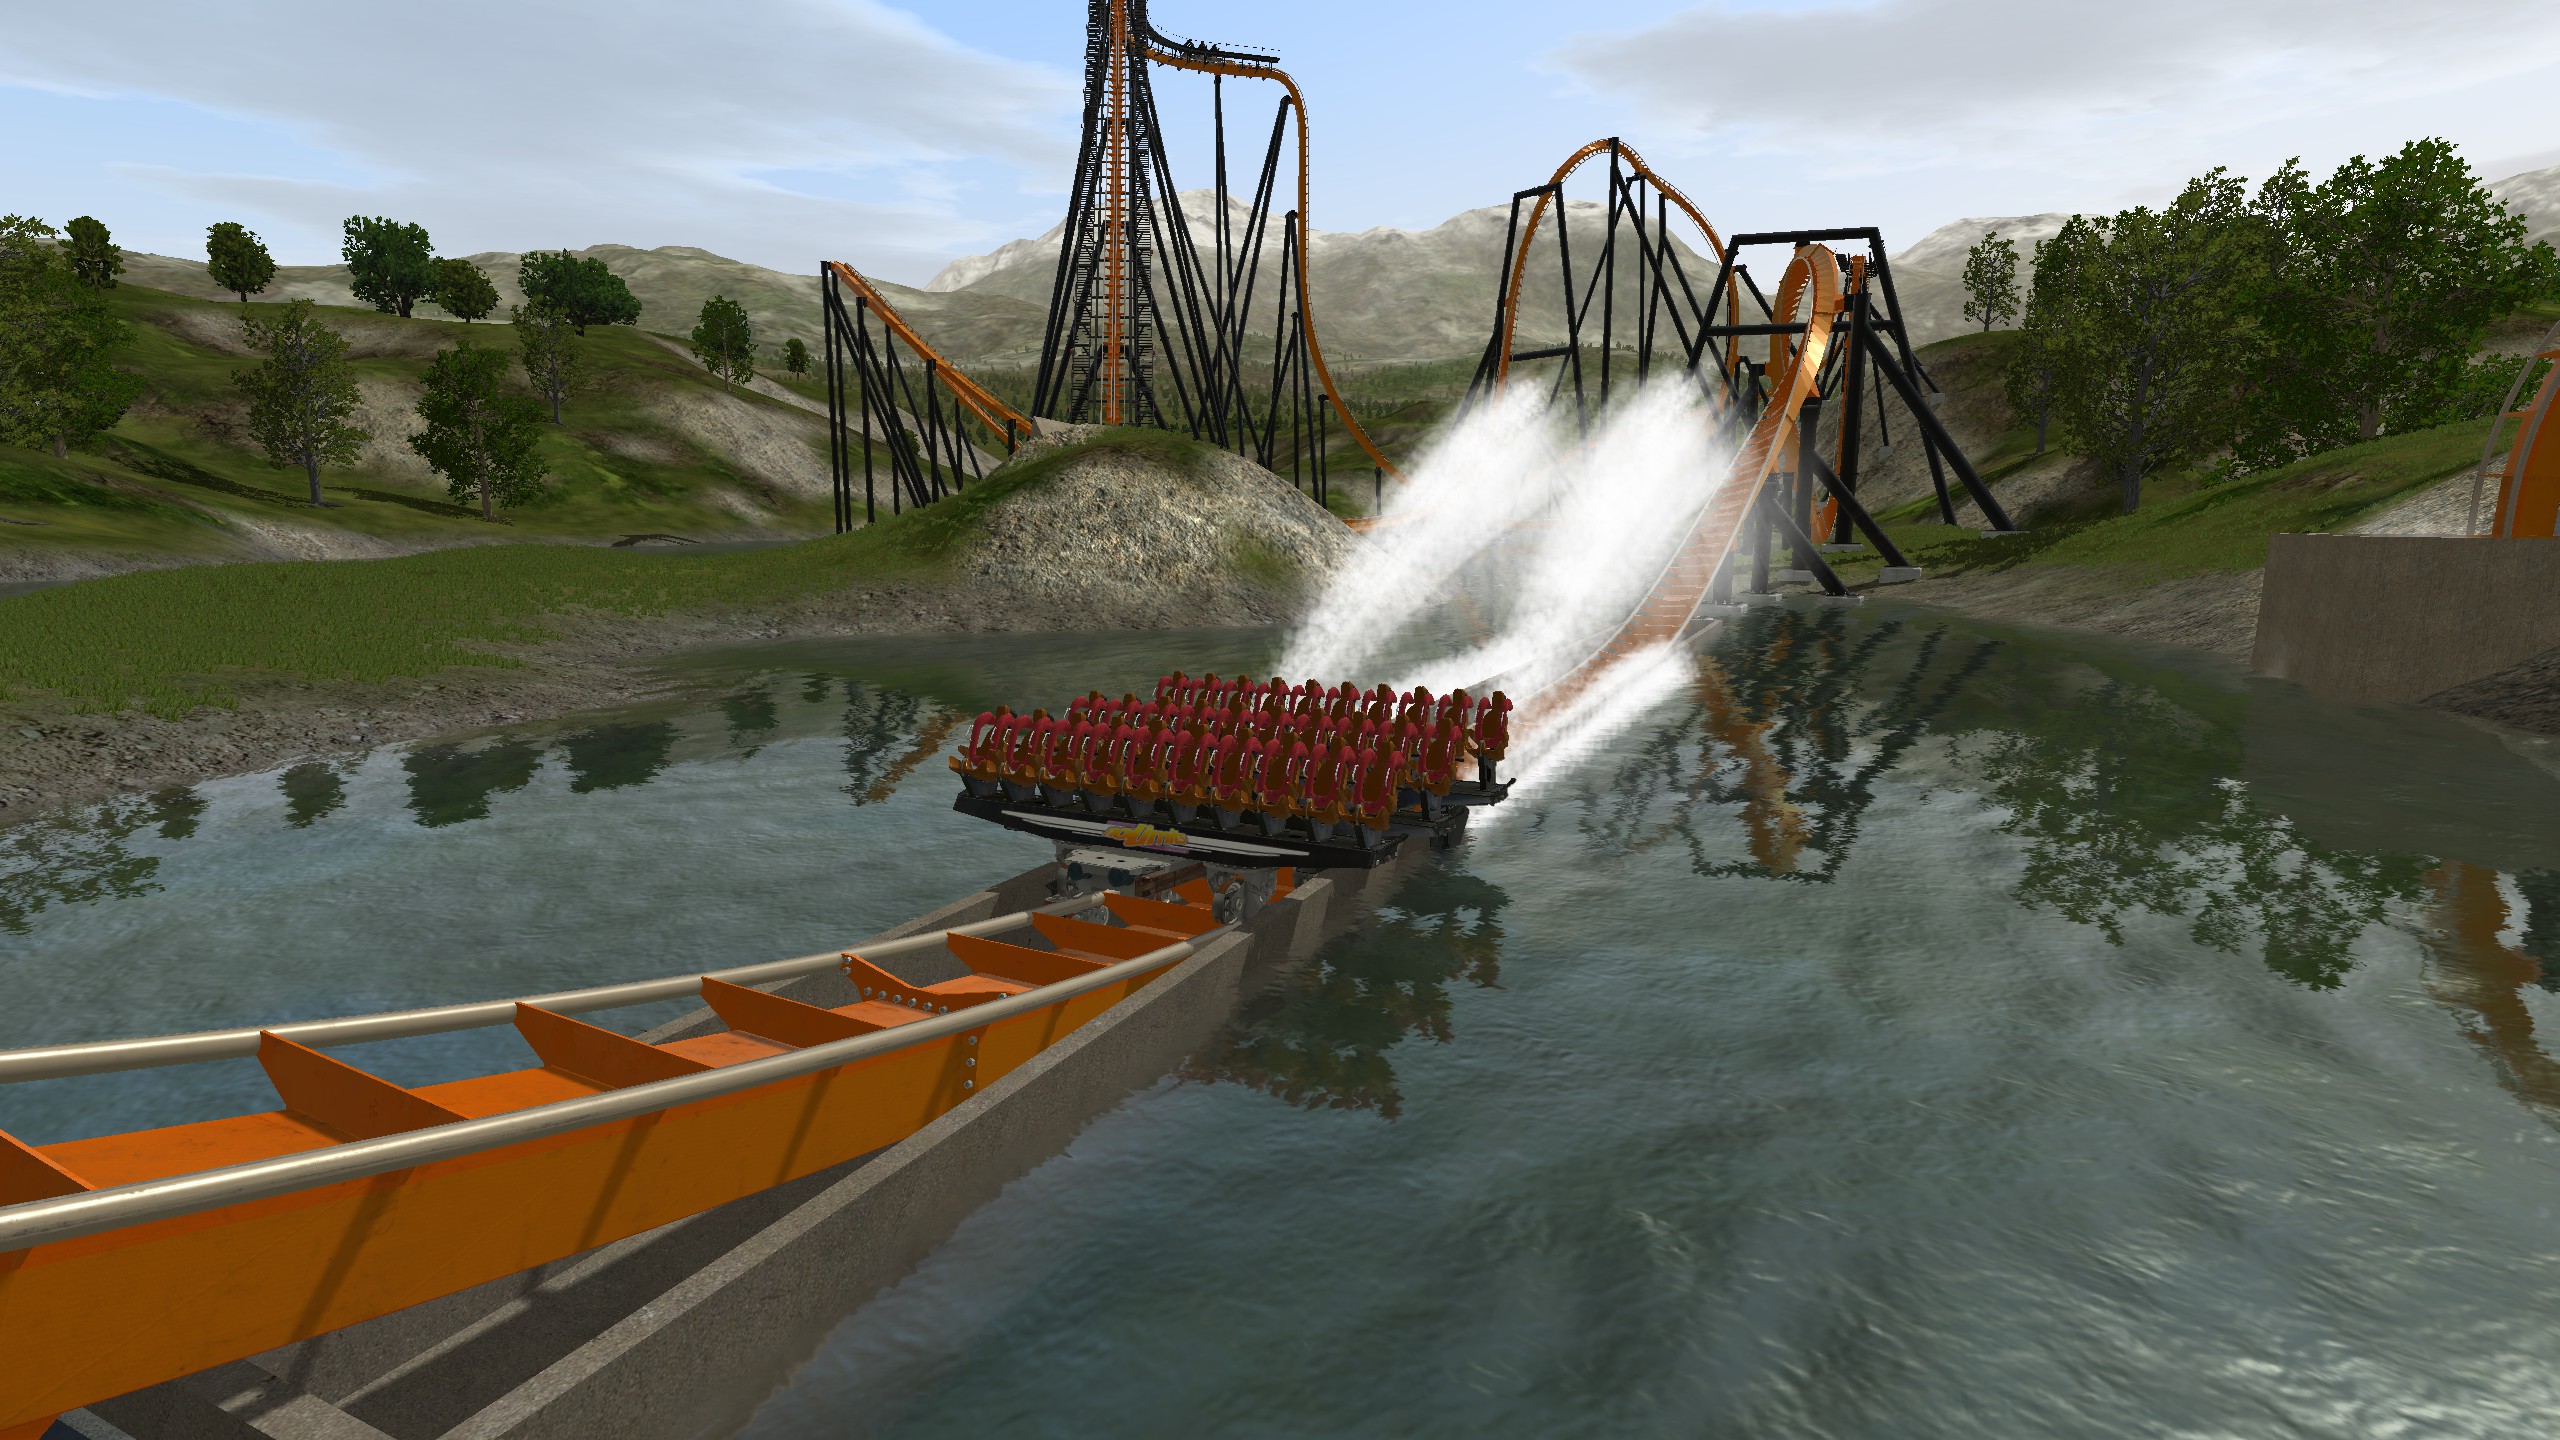
There is finally a splash-down option, but only for some specific coaster types.

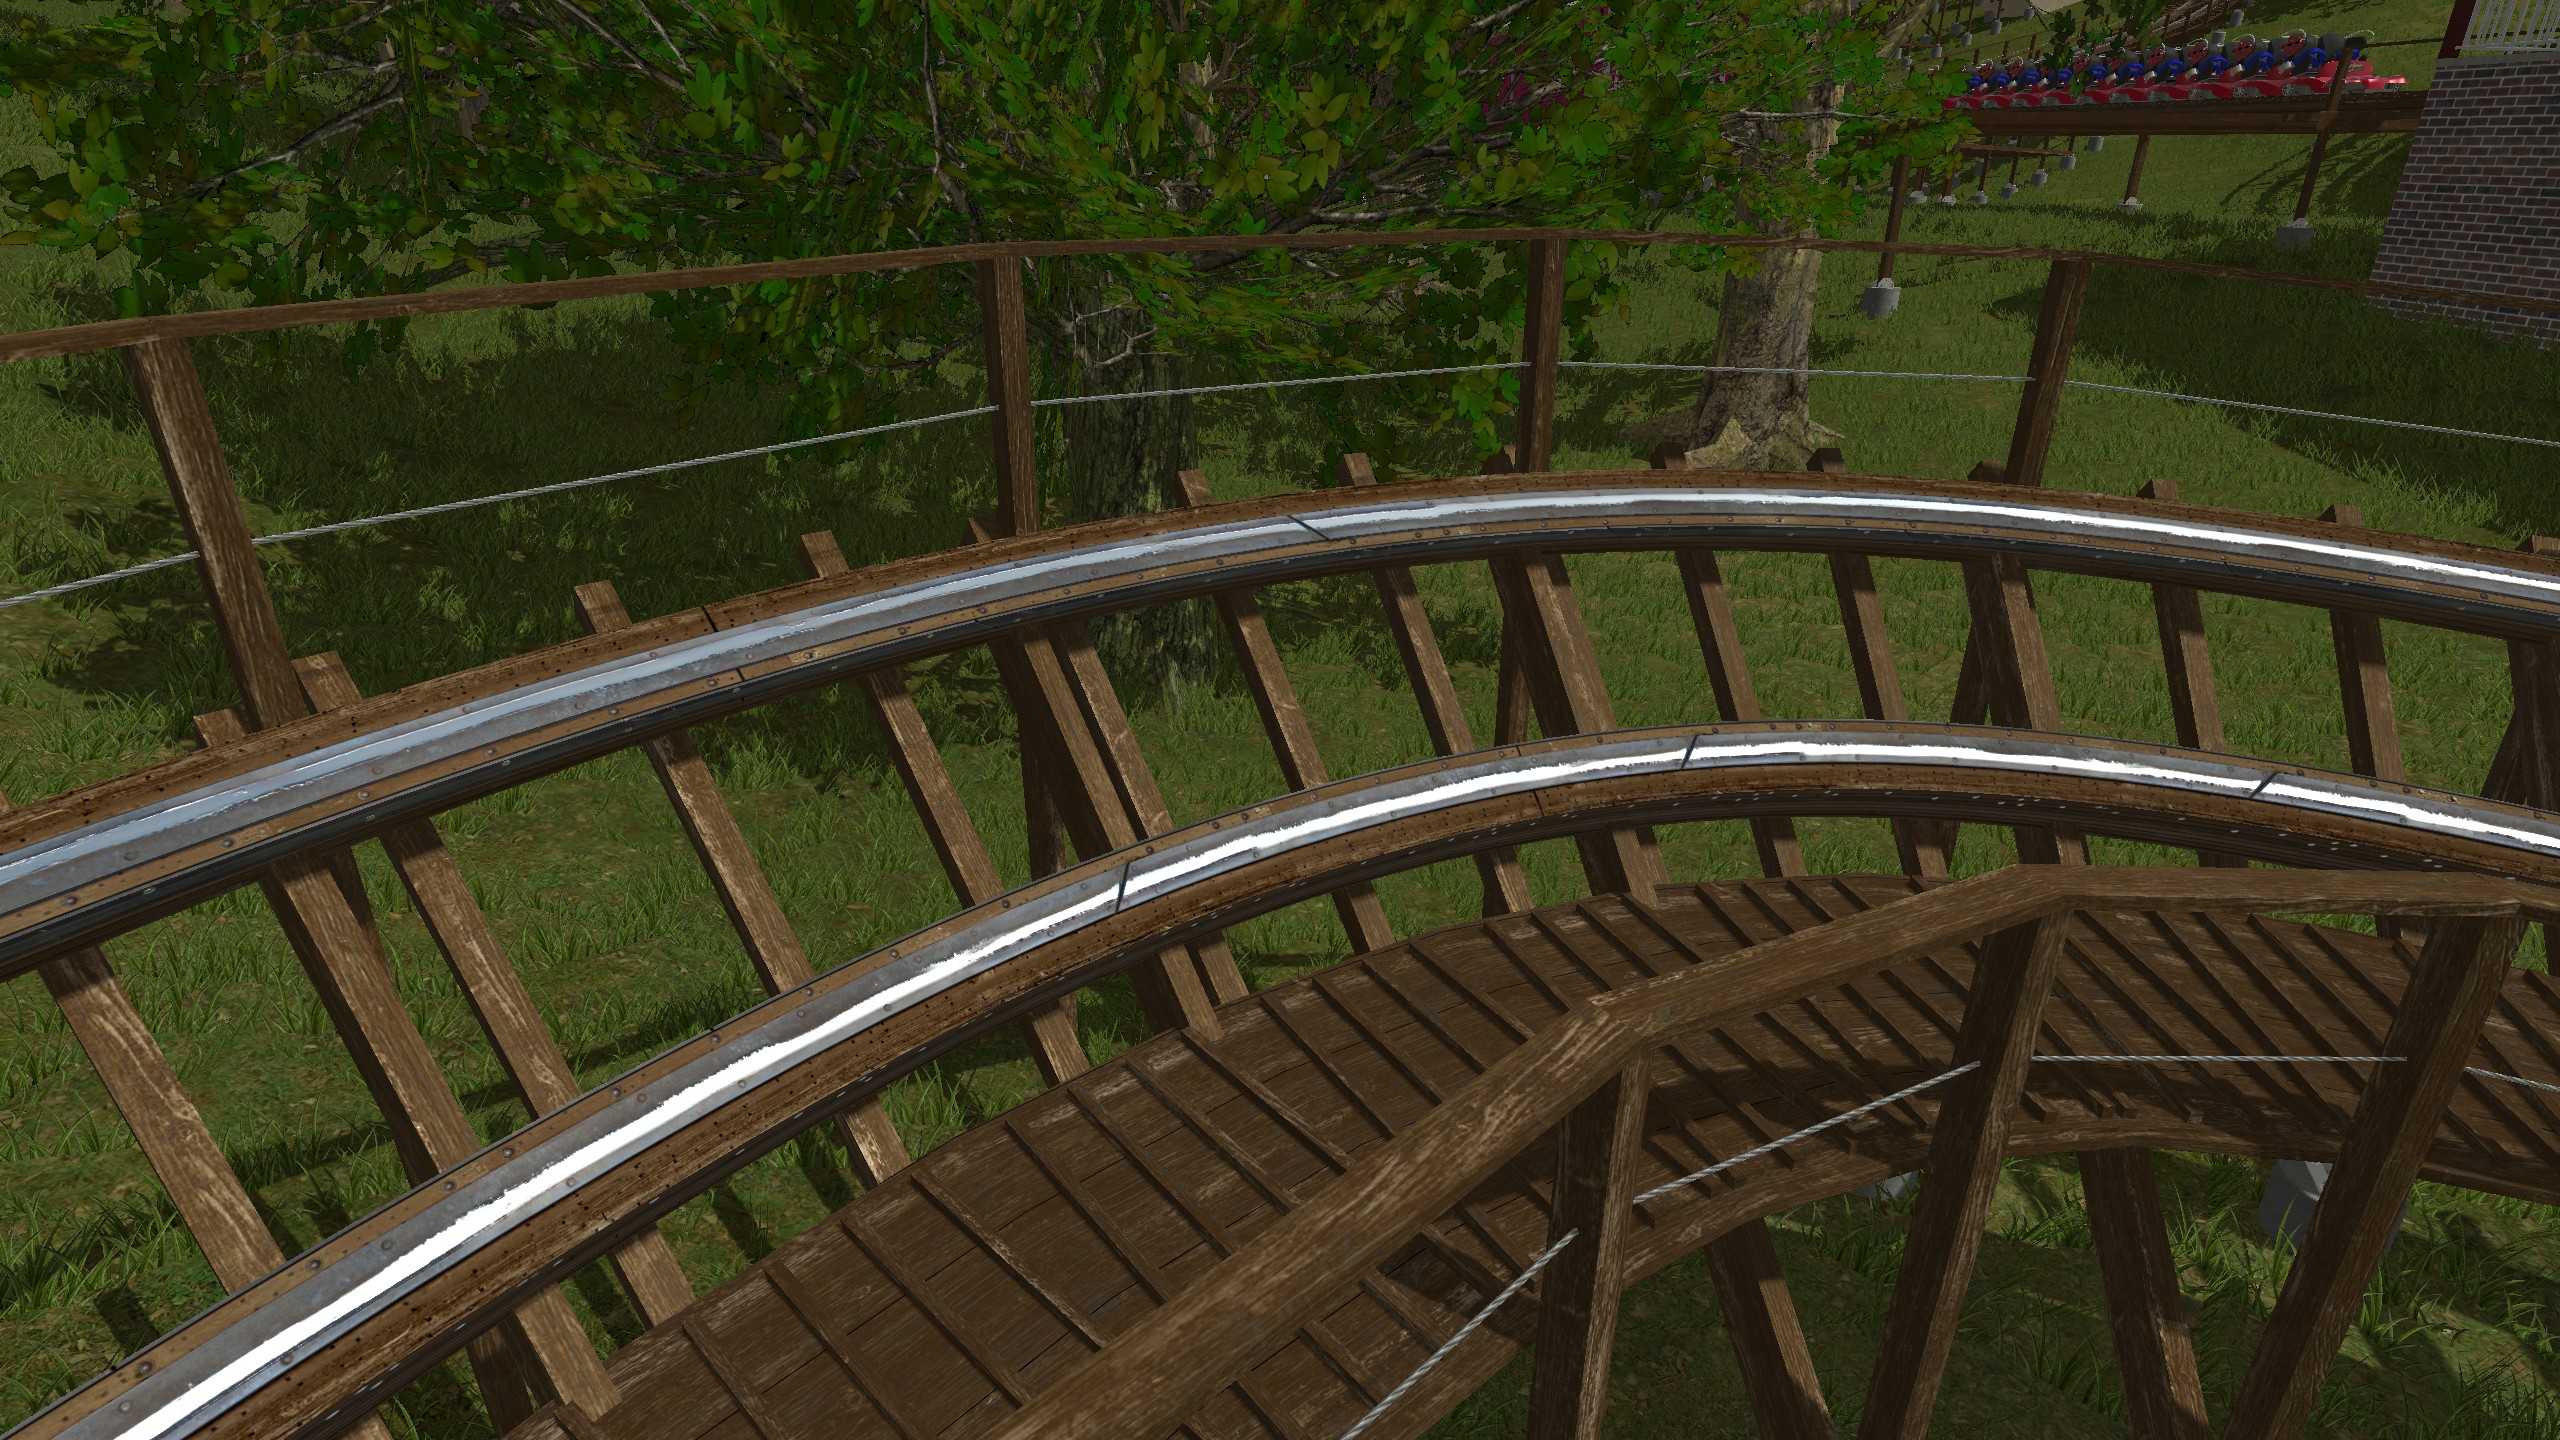
There is so much detail in this that they even replicated the floor system on the Dive coasters down to every single hydraulic ram. They even added a reflective pattern on worn track steel on wooden roller coasters.
 ‘
‘
Camera control is pretty much the same as it was in NL1, but a few tweaks have been added to make it more “movie-like.”
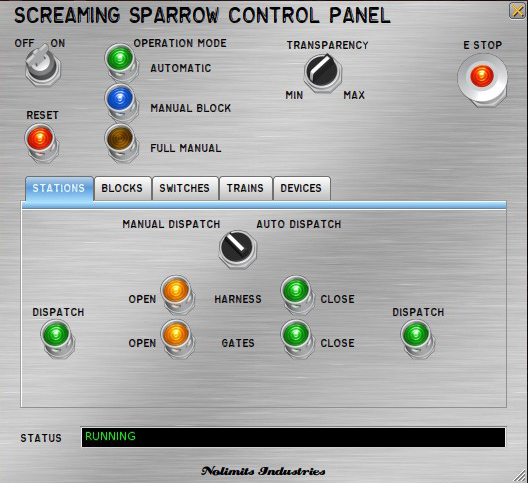
There is also an option to bring up a control panel to manually operate the coaster on various levels. Automatic, which is what every roller coaster is ran on when in operations. You can either have the computer run it for you, or you can dispatch and control the harnesses and gates much like the operators do in real life. Manual block, which gives you the option to run the coaster in a maintenance-type mode, and full manual, which allows you to control every aspect of the coaster, including which brakes are active, and being able to move the trains around the course like they have an engine on them.
The Verdict
I’m very impressed with the hard work the team has put into NoLimits 2 and is well worth the long 8 year wait. It does require some getting used to, especially if you used NL1, but other than that, I like it! My final verdict is a score of 9.5 out of 10. There are a few things that I’m hoping will get fixed in future releases, but overall, NoLimits 2 is a solid roller coaster simulator that I would not be surprised if parks start to use it for marketing purposes.
There is a lot more to this than what I just covered, so feel free to try the demo out yourself and purchase the game at the official NoLimits 2 website, http://www.nolimitscoaster.com/.
NoLimits 2 is now on Steam! Check it out there! http://store.steampowered.com/app/301320/
If you have any questions, comment below! Feel free to ask if your computer can run this as well. Just list your computer specs in your comment and I’ll get back to you!


Hey! Thanks for this nice review.
Do you think that the Macbook Air 2013 (4GB RAM, Intel HD Graphics 5000, core i5 1,3GHZ) can run it?
It may be necessary to set down some graphic details but I’m assuming it can run decently. Am I wrong?
Yes, it shouldn’t have too much of a problem running it, although I’m assuming you’d be running it under Windows since the Mac version isn’t out yet?
You’d just have to adjust the settings somewhere between quality and performance.
Yes I’ll have to run it through bootcamp that allows the macbook to use Windows and therefore Windows softwares…
Thanks for your answer and sorry for my english I’m french 😉
Do you recommend using no limits 2 with an Acer Aspire? One problem i had was that it skips sometimes during play mode.
how pricey?
Is this program suitable for a 11 year old? Any other program you would suggest for a boy with a lot of passion to design roller coasters?
I wonder if this can handle it lol but I want to know what my frame rate would actually be:
i7 4930K
16GB Dominator Platinum 2.8GHz
GTX 980 Superclocked
Rampage IV Extreme
4K resolution??
Also, can someone like me coming from the RCT line quickly make a roller coaster, like within twice the time of an equivalent ride in RCT3??
Thanks for the feedback!
Rcr22: $40 on Steam
Rosa: from what I’ve heard it takes a while. If you want quick, get RCT3 on Steam. Platinum edition is $20 and it uses preset track parts. Not nearly as realistic, but if you want, wait a few months for RCTW to come out. It will be more like no limits 2
Nathan,
You should easily be able to push 60fps with that GPU and processor, but not entirely sure how it’ll run using a 4K resolution. I have a 2560×1440 monitor and I can get a steady 60fps+ with my 670 in SLI with moderate scenery. The more trees, supports, water, and coasters there are in view, the lower the frame rates drop. Even with the newest GPU, I don’t recommend running it in the full 4K resolution because you’ll notice rather large frame drops and it’ll run rather choppy.
This is completely different than RCT and is on a whole different level of difficulty. It’ll take you a couple hours getting a hang of learning how the track system works. If I were you, I’d start out with simple out-and-back style coasters with no inversions. That’ll at least get you used to how the node system works.
Can the windows version be ran on a macbook pro and if so how do you get it to run on one
Thanks! This really helped me to decide whether or not to get the game.
I have an 27inch iMac with and Intel HD Graphics 3000 512 MB, do you think I can even play the game without extreme lag?
Thank you.
This really helped me to decide whether or not to get the game.
I have an 27inch iMac with and Intel HD Graphics 3000 512 MB, do you think I can even play the game without extreme lag?
If you have a 27″ iMac, then you should have a higher-end graphics chipset, either from Nvidia or AMD depending on what model year it is and shouldn’t have Intel Graphics as they never made one with that graphics chipset. If you go to the Apple menu in the upper left corner and go to “About this Mac,” it should give you a run-down of what hardware you have. More specifically looking for the model year and graphics.
But mind you, there is only a Windows version available right now. You’ll need to have Windows set up using Boot Camp. A VM (virtual machine) version such as Parallels or VMware will not work.