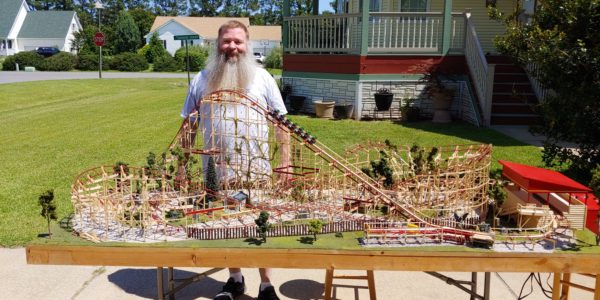
We love a good roller coaster model here at Coaster101, so when I stumbled upon the video below of an awesome working custom made creation, I just had to know more. Luckily, I was able to get in contact with the current owner of the model, Eric Roberts, and we chatted about his newly added working transfer track, how to NOT set the model accidentally on fire, and much more.
C101: For those who don’t know you, Eric, could you please introduce yourself: who are you and what do you do?
Eric: Hi, I am Eric Roberts. I live in Virginia during the week and have a weekend home in North Carolina where all my projects and models are. I have a degree in Engineering Electronics and have always enjoyed tinkering. I usually spend my time creating Halloween props – and because of my love of amusement parks, I turned my home haunt into a dark ride with two autonomous carts. I also have a collection of roller coaster parts including a car for the Hersheypark Sidewinder. Of course, I own and build with various coaster model systems.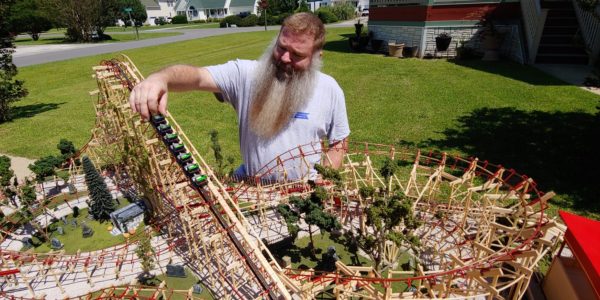
C101: How did you get into roller coasters and theme parks?
Eric: Well, I was scared of coasters until my step dad made me ride the Rebel Yell at Kings Dominion in the summer of 1985. It was an amazing conflict between fear and fascination. I noticed how the trains never actually left the track and I wanted to know why and how. It wasn’t until the early 90s when I learned about ACE (American Coaster Enthusiasts) and finally had a resource to learn more about roller coasters.
C101: And how did the love of coasters translate to coaster models?
Eric: I have always been fascinated by gravity powered toys such as SpaceWarp, Hot Wheels tracks, and various other marble run type toys.
C101: Do you have a lot of experience building roller coaster models?
Eric: In the early 2000s I found a web page of a model coaster builder, Mike Graham, and was glued to every page, every detail. I started collecting RC car parts and bearings to build a custom model based on his Ice Screamer for a local toy store. That’s when I received a flyer for CoasterDynamix (coincidentally Mike Graham is a founder), and the timing couldn’t be more perfect. the toy store and I bought a couple of kits and had a custom display running for months.
My first model? Well, it was not built by me. This is the creation of Phil Kaiser.
C101: How did you discover the model and how did it fall into your hands?
Eric: Being one of the first customer’s of CoasterDynamix, I got to work with the owner, Jack Rimer, for several of his show models. I did some electronic control work for them. When he got this model from Phil around 2007 (?), I was mesmerized by it. Anytime I would chat with Jack, I would always ask “Ya wanna sell that model yet?” Imagine my surprise when during a recent conversation, he asked if I was still interested in it. I thought he was pulling my leg!
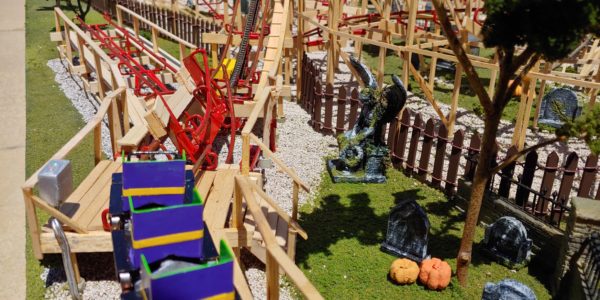
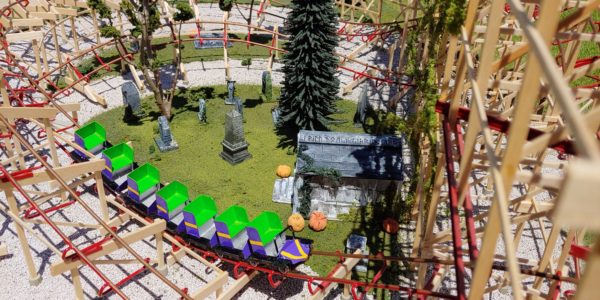
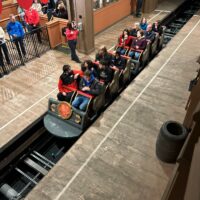
Since I have taken ownership of it, I have been performing a lot of repairs as it was in a room that also had a ping pong table and kids…I have also been modifying it and starting to theme and landscape it. I have built a working switch-track and storage area to work on the train. I also have plans to upgrade it with a working block system and second train.
C101: Can you describe the process a little bit: What goes into planning? Do you design it on paper or computer first?
Eric: Sure, I don’t know anything about computer design so that has not been an option. When I have built other models it’s a loose concept in my head of what I want to do. I might do a napkin sketch to visualize, but never anything more than that.
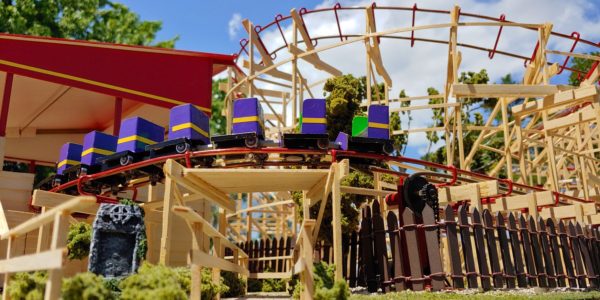
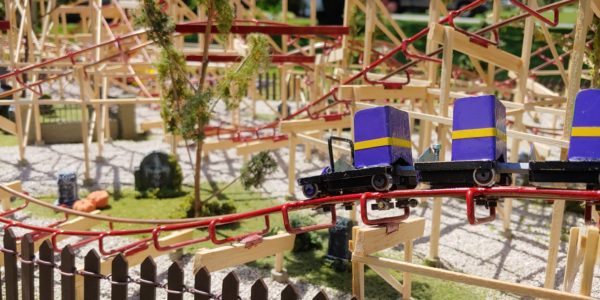
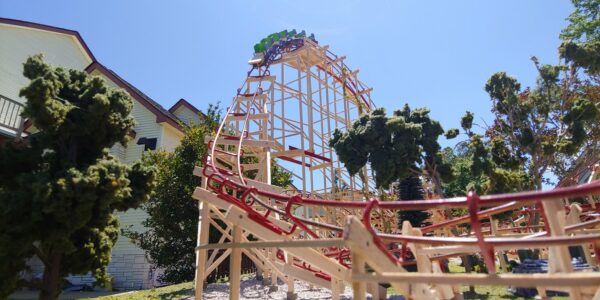
I should clarify that other than repairs, the wooden model is largely as Phil built it originally. I have, however, created a storage track and transfer/switch track and blended it into the model.
That was done by cutting a strip of cardboard into a mock-up of the new track path. I did this to check clearances to the existing structure. I took a measurement of the length of the train to ensure the storage track was long enough as I knew I wanted it to be removable. Beyond that, I really just build free-form. I know it sounds silly, but sometimes, the models present their own flow.
C101: What’s the most challenging aspect of the project?
Eric: Not setting the whole thing on fire. LOL
C101: Haha! Really?
Eric: Several of the repairs involve re-soldering the rails onto the crossties. Phil used 1/8″ copper tube (which is much easier to bent than the brass rod, BTW) and I am guessing copper for the cross-ties. The problem is the whole thing acts as a heat sink when trying to solder. A soldering iron has almost no effect. A soldering gun will work, but takes a long time to heat the area sufficiently. I found a mini butane torch is perfect for the job. But. the angles you have to be very aware of the area. I have scorched the grass and rock in several places. I even burnt all of the handrails and walk boards I removed to install the switch track because I placed them on the “ground” under the track to try to keep track of their placement. Oh well, at least they were pieces I was going to modify anyway.
OK, fire is a challenge, but to be fair, reverse engineering how Phil built the model and then re-create the style to look original has been the real challenge. I got to speak with Phil when he learned I now have the model. Those cross-ties? They were bent on a specific pair of pliers that gave him the consistent shape on every one. Well, I don’t have anything that worked that well for me – So, I hand bent and compared the dozen or so I made. Don’t look too closely.
C101: What material and/or tools do you use?
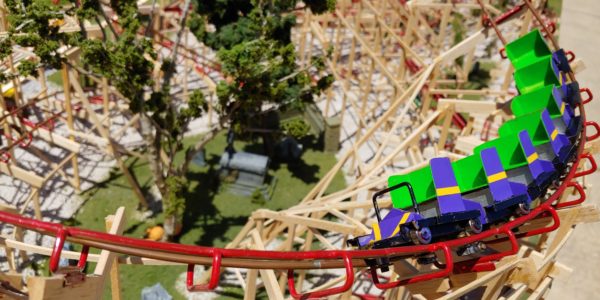
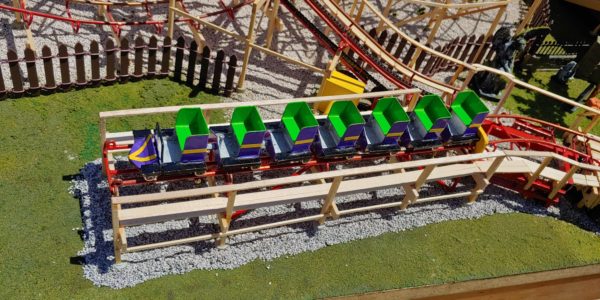
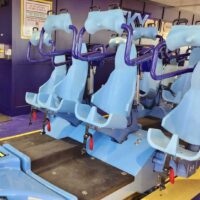
Eric: For the repairs, I used balsa and bass wood. For the storage track and switch track, I used 1/8″ brass rod for the rails, 12AWG copper wire for the cross-ties, brass structure for the spine and hard-stops. I then used balsa and bass wood to build the wooden structure, walk boards and handrails around the storage track and transfer area.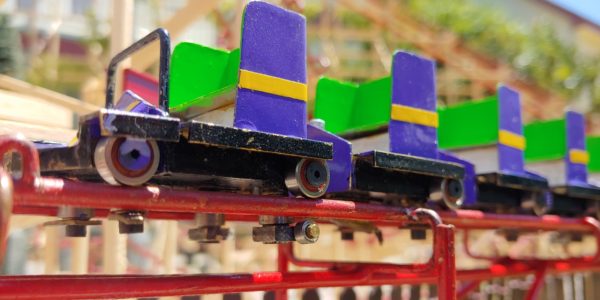
For the theming and landscaping I am using typical model train landscape material. Also, I am 3D printing grave markers, a mausoleum, tombs and fence/wall to give it a Halloween feel. It’s likely going to be one of the line queue activities for the kids waiting to go through my haunt so, it seems to make sense. I mean, my main hobbies are Halloween and Roller Coasters after all.
C101: Wait, you made your own ride through haunt attraction with automated vehicles?!
Eric: Yep.
C101: That sounds amazing. We need to hear more about that.
Stay tuned for Part 2 where we talk to Eric about his homemade haunted dark ride!
Thanks again to Eric for taking the time and answering our questions.


Recent Discussion