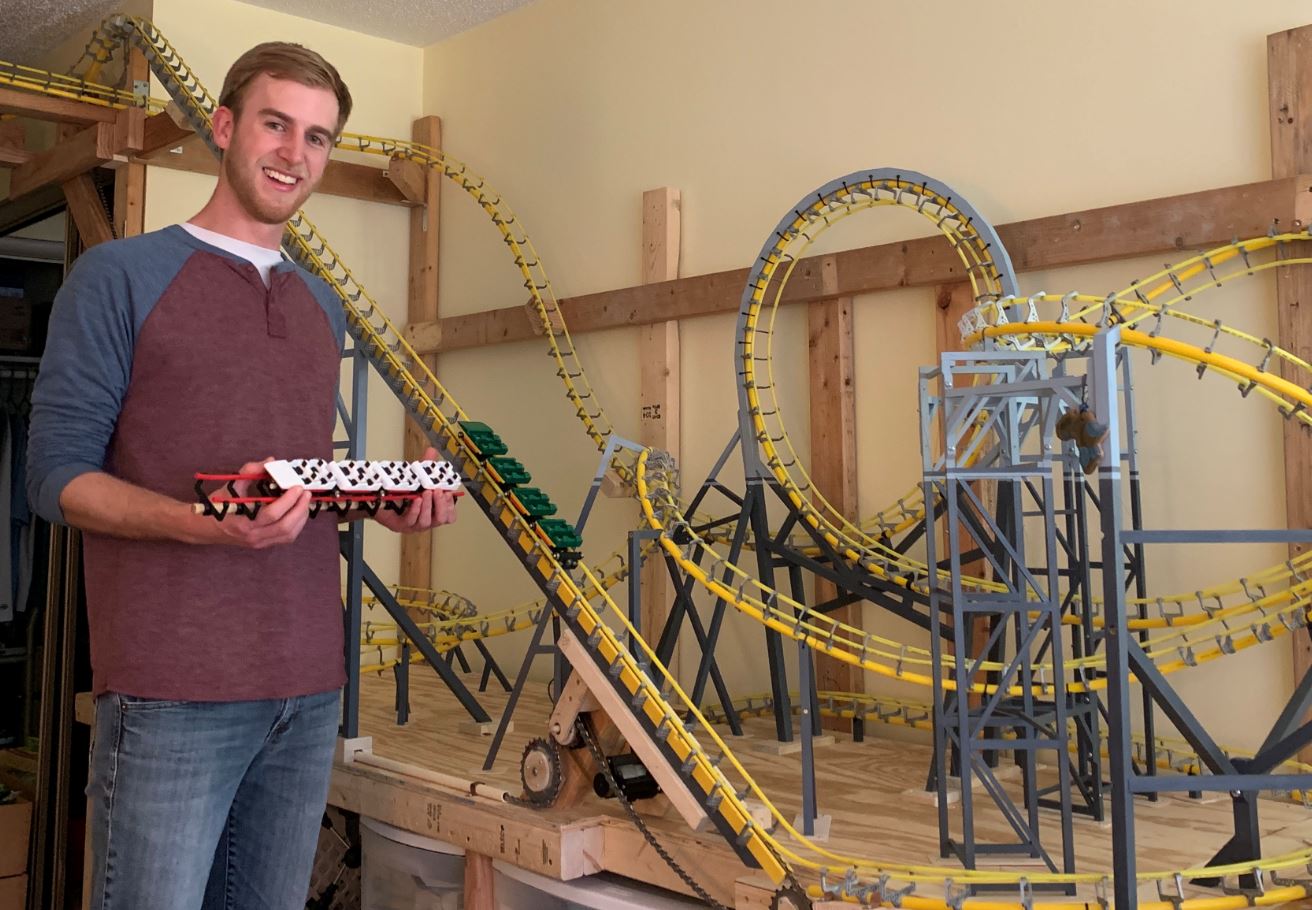
Jonnie Rothfus recently completed a custom-built, Arrow Dynamics-inspired roller coaster model in his apartment. I had the chance to chat with him to learn about the design process and construction of the incredible working model.
UPDATE (8/16): Jonnie’s model is complete! See the model in action:
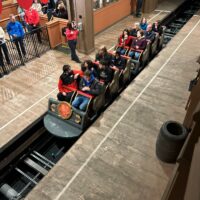
Before reading the interview, watch an on-ride POV of his roller coaster model below:
C101: First, can you tell me a little bit about yourself – if you’re in school, working, etc. How did you become interested in roller coasters?
 Jonnie: My name is Jonnie Rothfus and I currently live in Virginia. I graduated from college with a Construction Management degree a couple years back and moved out to the east coast to work for a construction company as a Project Engineer. As far as I can remember, I’ve always enjoyed roller coasters, and I attribute the start of this interest in roller coasters to an experience I had with my dad. When I was about six, my dad and I made an impromptu trip to Six Flags Over Georgia near Atlanta and rode the Dahlonega Mine Train repeatedly late into the night. Ever since then I’ve always itched to go back to amusement parks and make new memories with friends and family.
What other kinds of models have you built?
As far as roller coasters models go, this is only my second custom roller coaster model to be built.
Jonnie’s first coaster model
The first model I built was also an Arrow Dynamics-inspired custom looper which went around the living room in my previous apartment. Unfortunately, this model didn’t live very long as I moved apartments shortly after, but with the experience under my belt I began to think of ways to improve my design on a new roller coaster for my next apartment.
What led you to want to build a working roller coaster model like this?
 I’ve always loved creating miniature things with my hands, whether it be small houses out of clay or pinewood derby cars designed to look like a ferris wheel, a ping-pong table and pool table. I’d always had a dream to build roller coasters someday, and in the back of my mind I was always trying to figure out how to create my own model roller coaster. A couple of years back, I saw a fundraiser on Kickstarter for a model roller coaster system with partially 3D printed and hardware store parts.
Unfortunately, this model never came about, but it got me thinking about how I could create my own model with what I had available. Thanks to Craigslist, I purchased various small tools and started creating my own trains by hand. Months later, my brother Daniel and I started designing and 3D printing some track-ties and tools, and the tinkering and building began.
Can you walk me through the design process? Did you use any software?
The design process usually started at night with sketches on pieces of paper and continued later into the night as ideas kept running through my head. I originally made some trains out of cardboard and pieces of track out of plexiglass and wood. Once this concept proved somewhat successful, I made trains out of wood, plexiglass and various other small parts.
 Moving past these models, my brother introduced me to a free CAD (Computer-Aided Design) program called Onshape where the wheel assemblies, train chassis, track-ties, motor mounts, etc. were designed. We then used a slicer program called Cura to turn the 3D file into a format the printer could read to plot its course for printing. Most of the small roller coaster pieces have now been designed on the computer which saves time in fine tuning parts as they can be designed, printed and adjusted within days. For designing the layout of the track, it was mostly trial and error to see what could fit into a small/narrow space while still maintaining a somewhat realistic roller coaster progression of elements.
What materials did you use to build the track and supports?
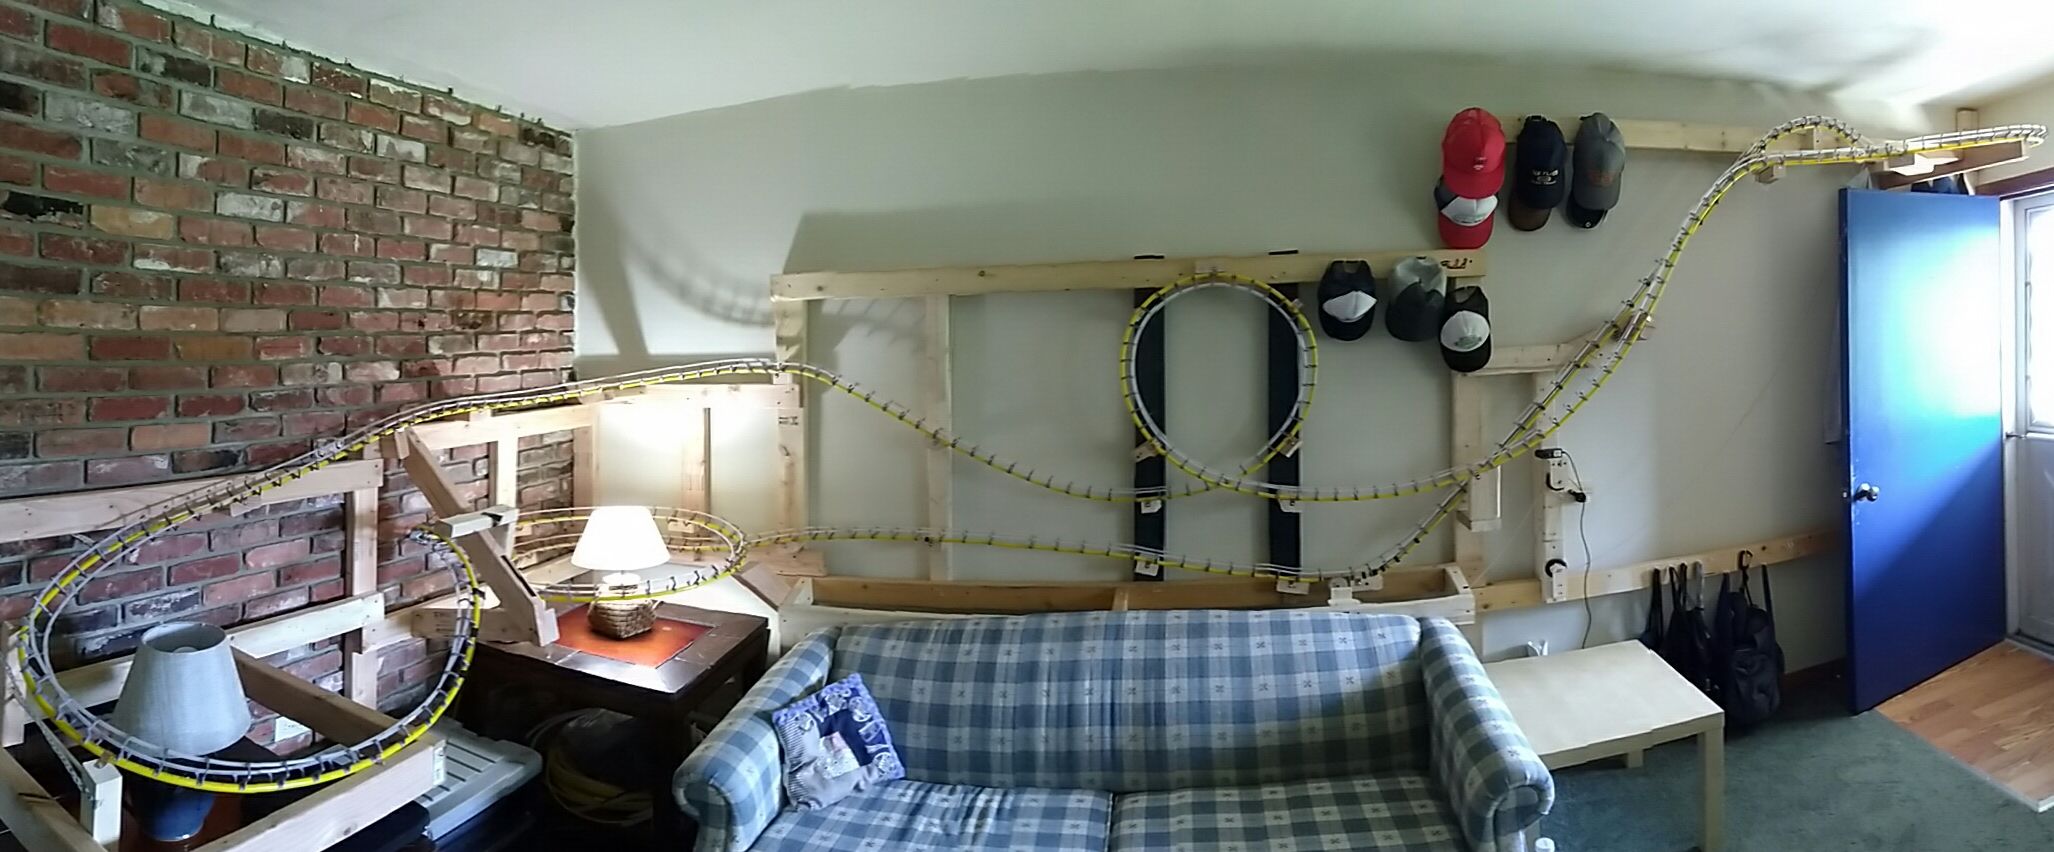
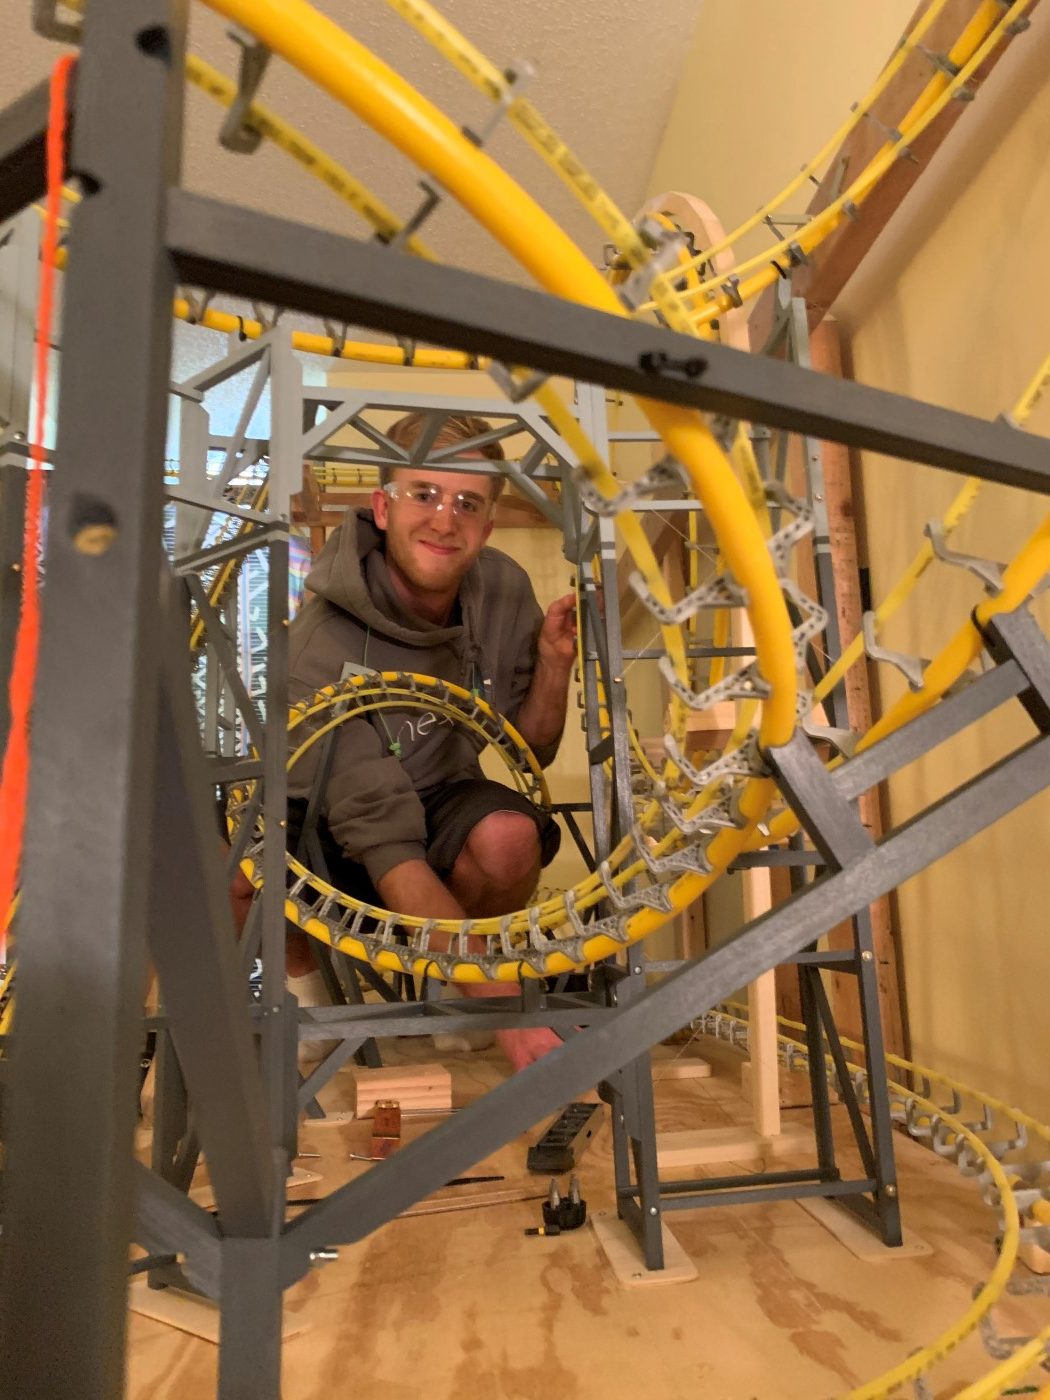
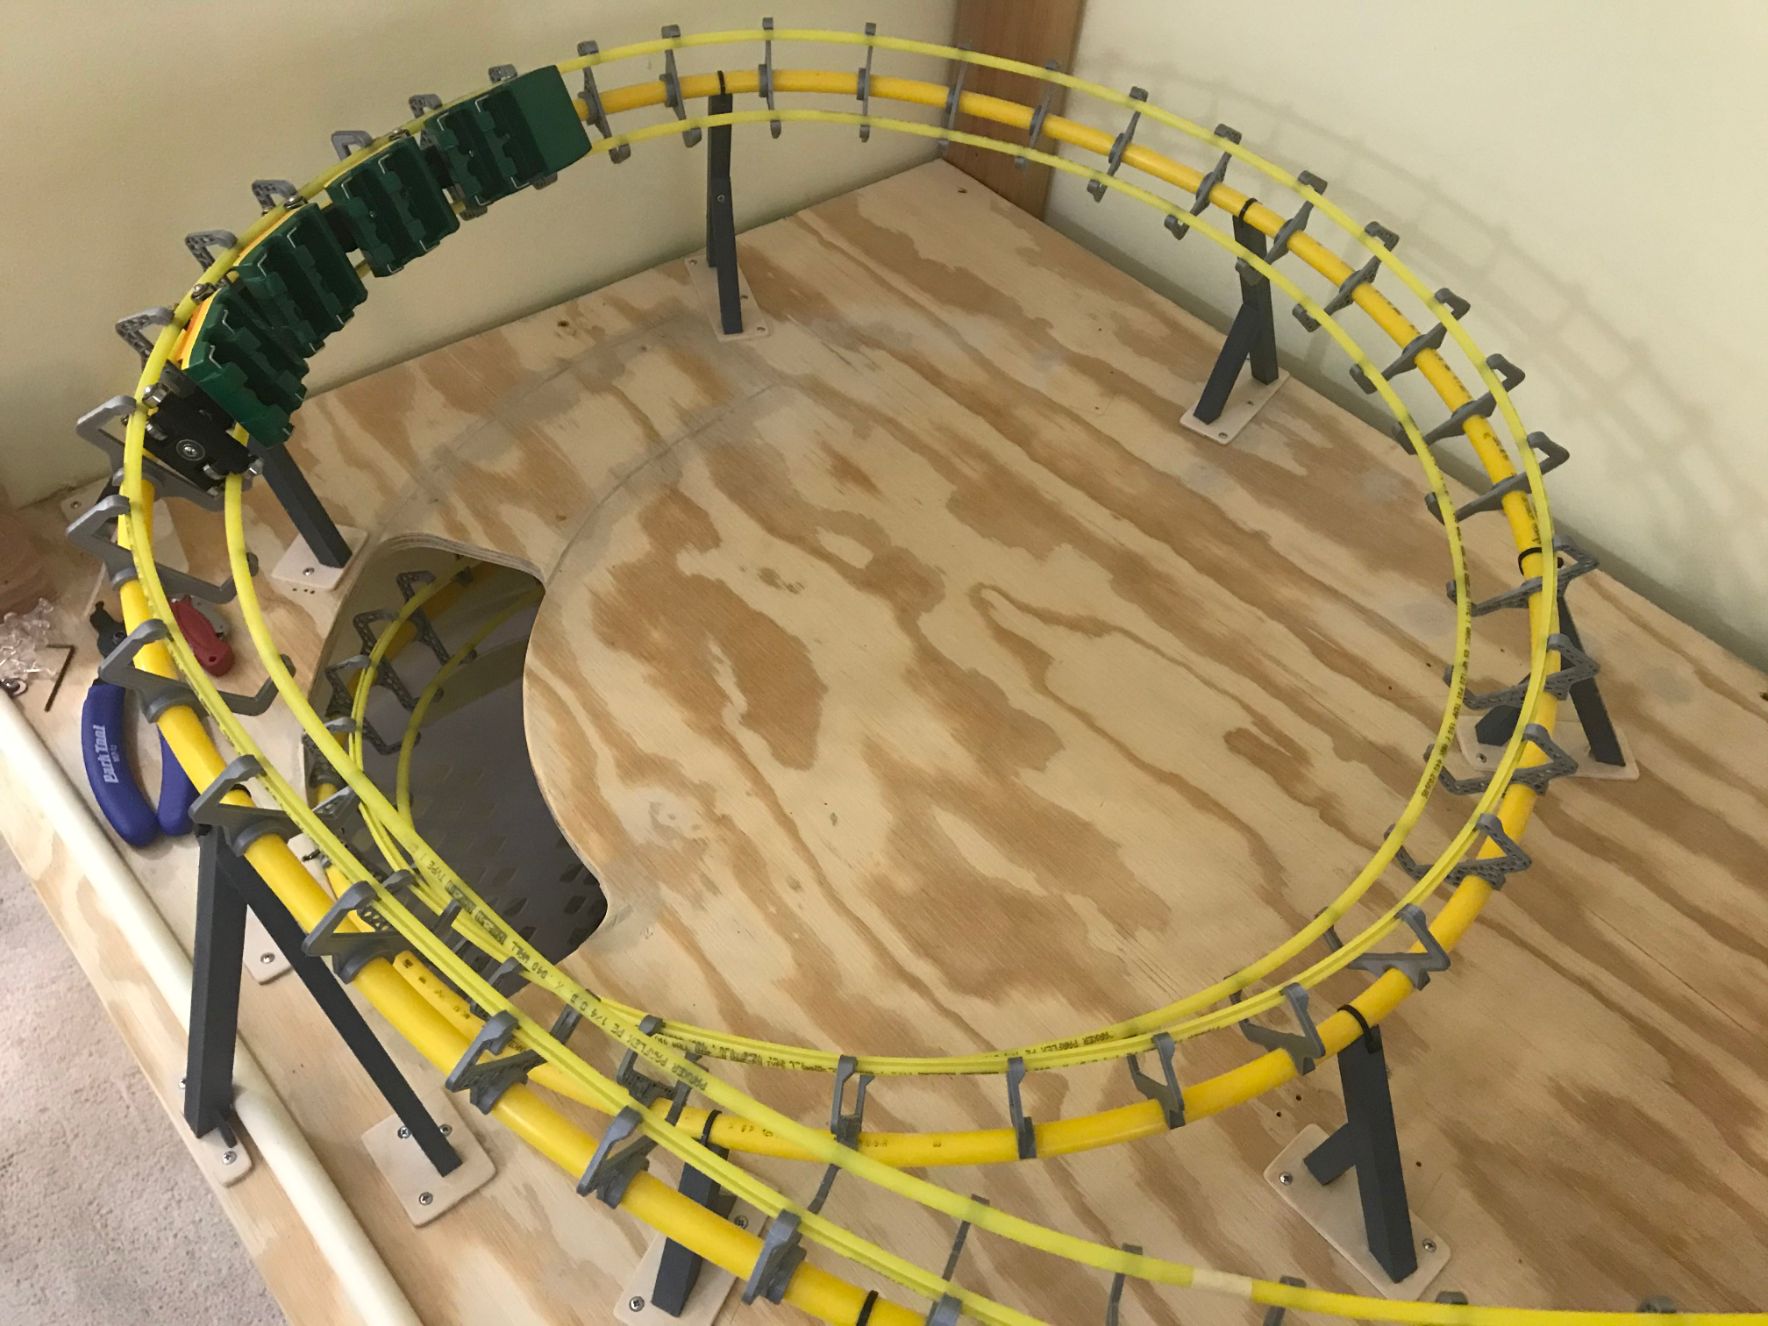
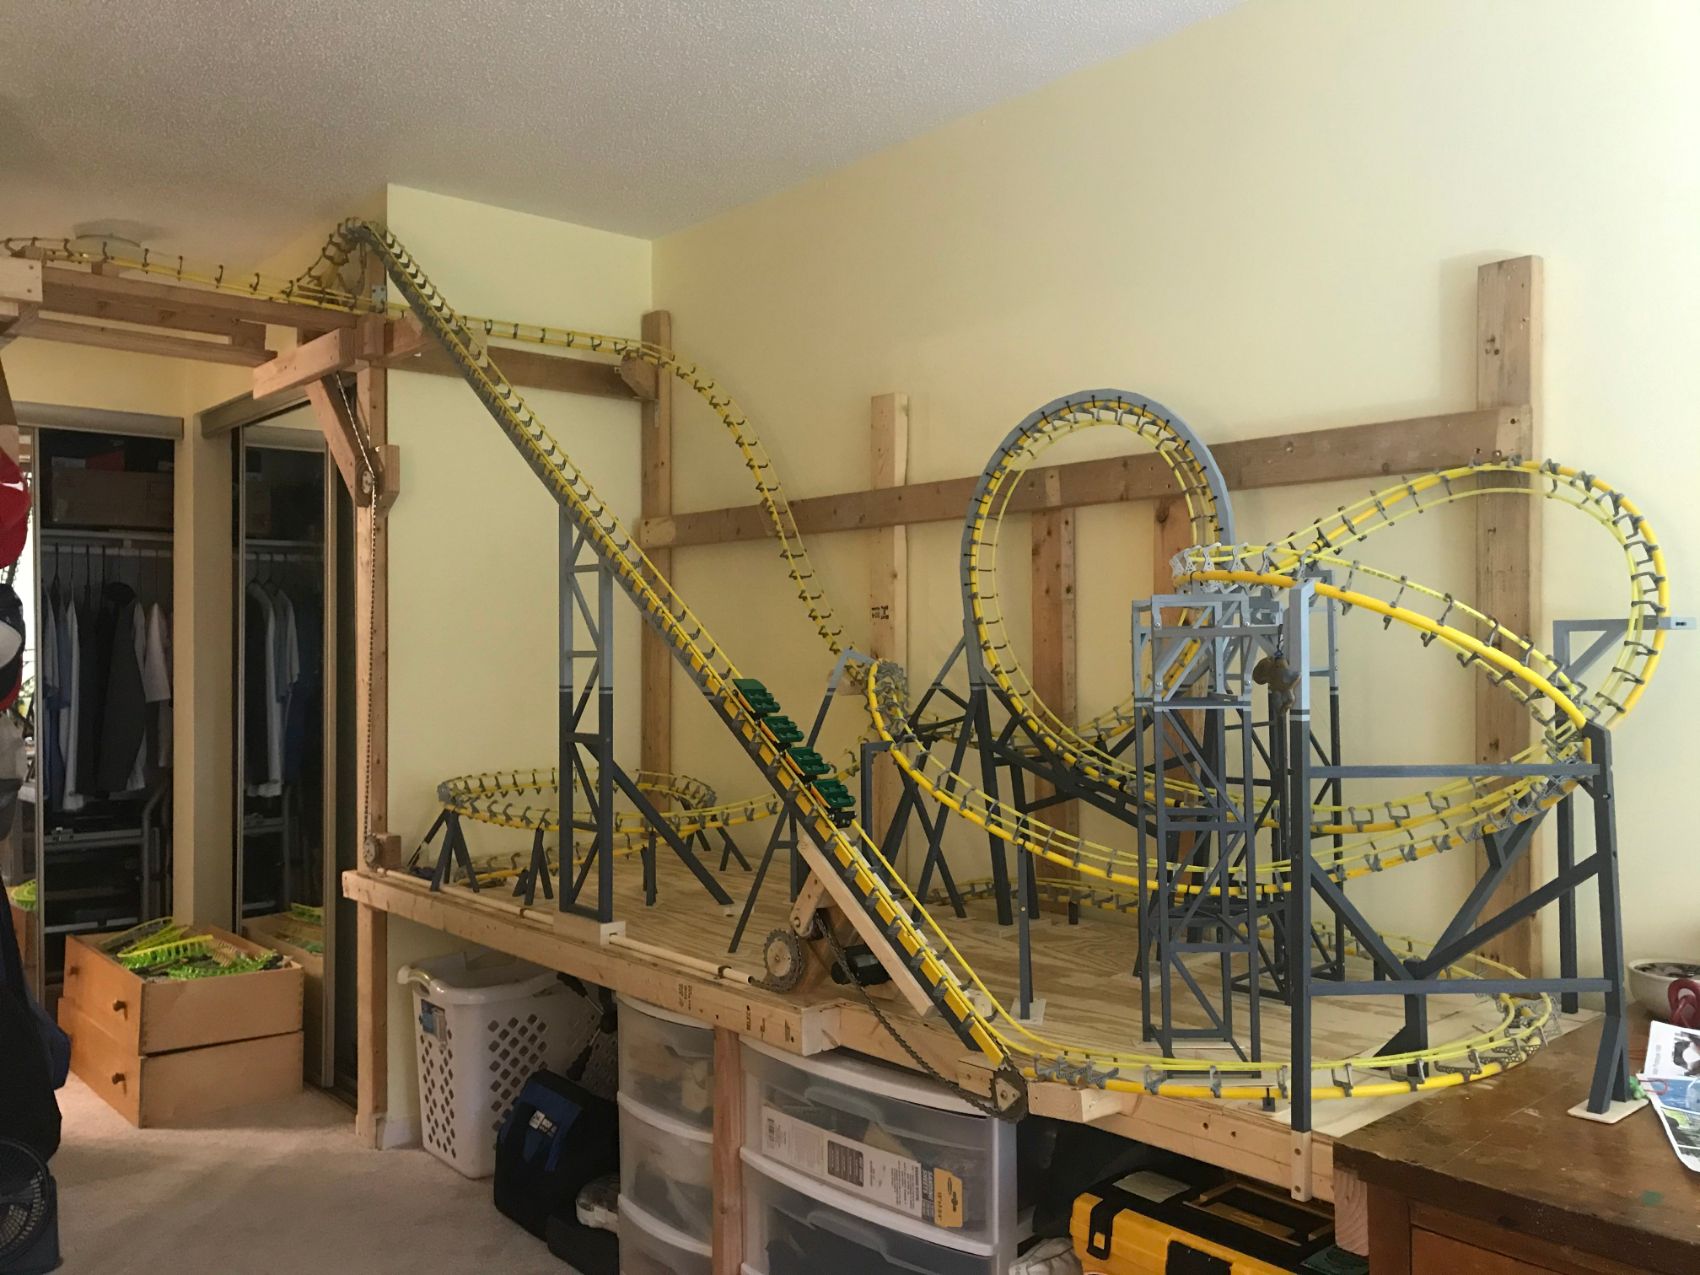
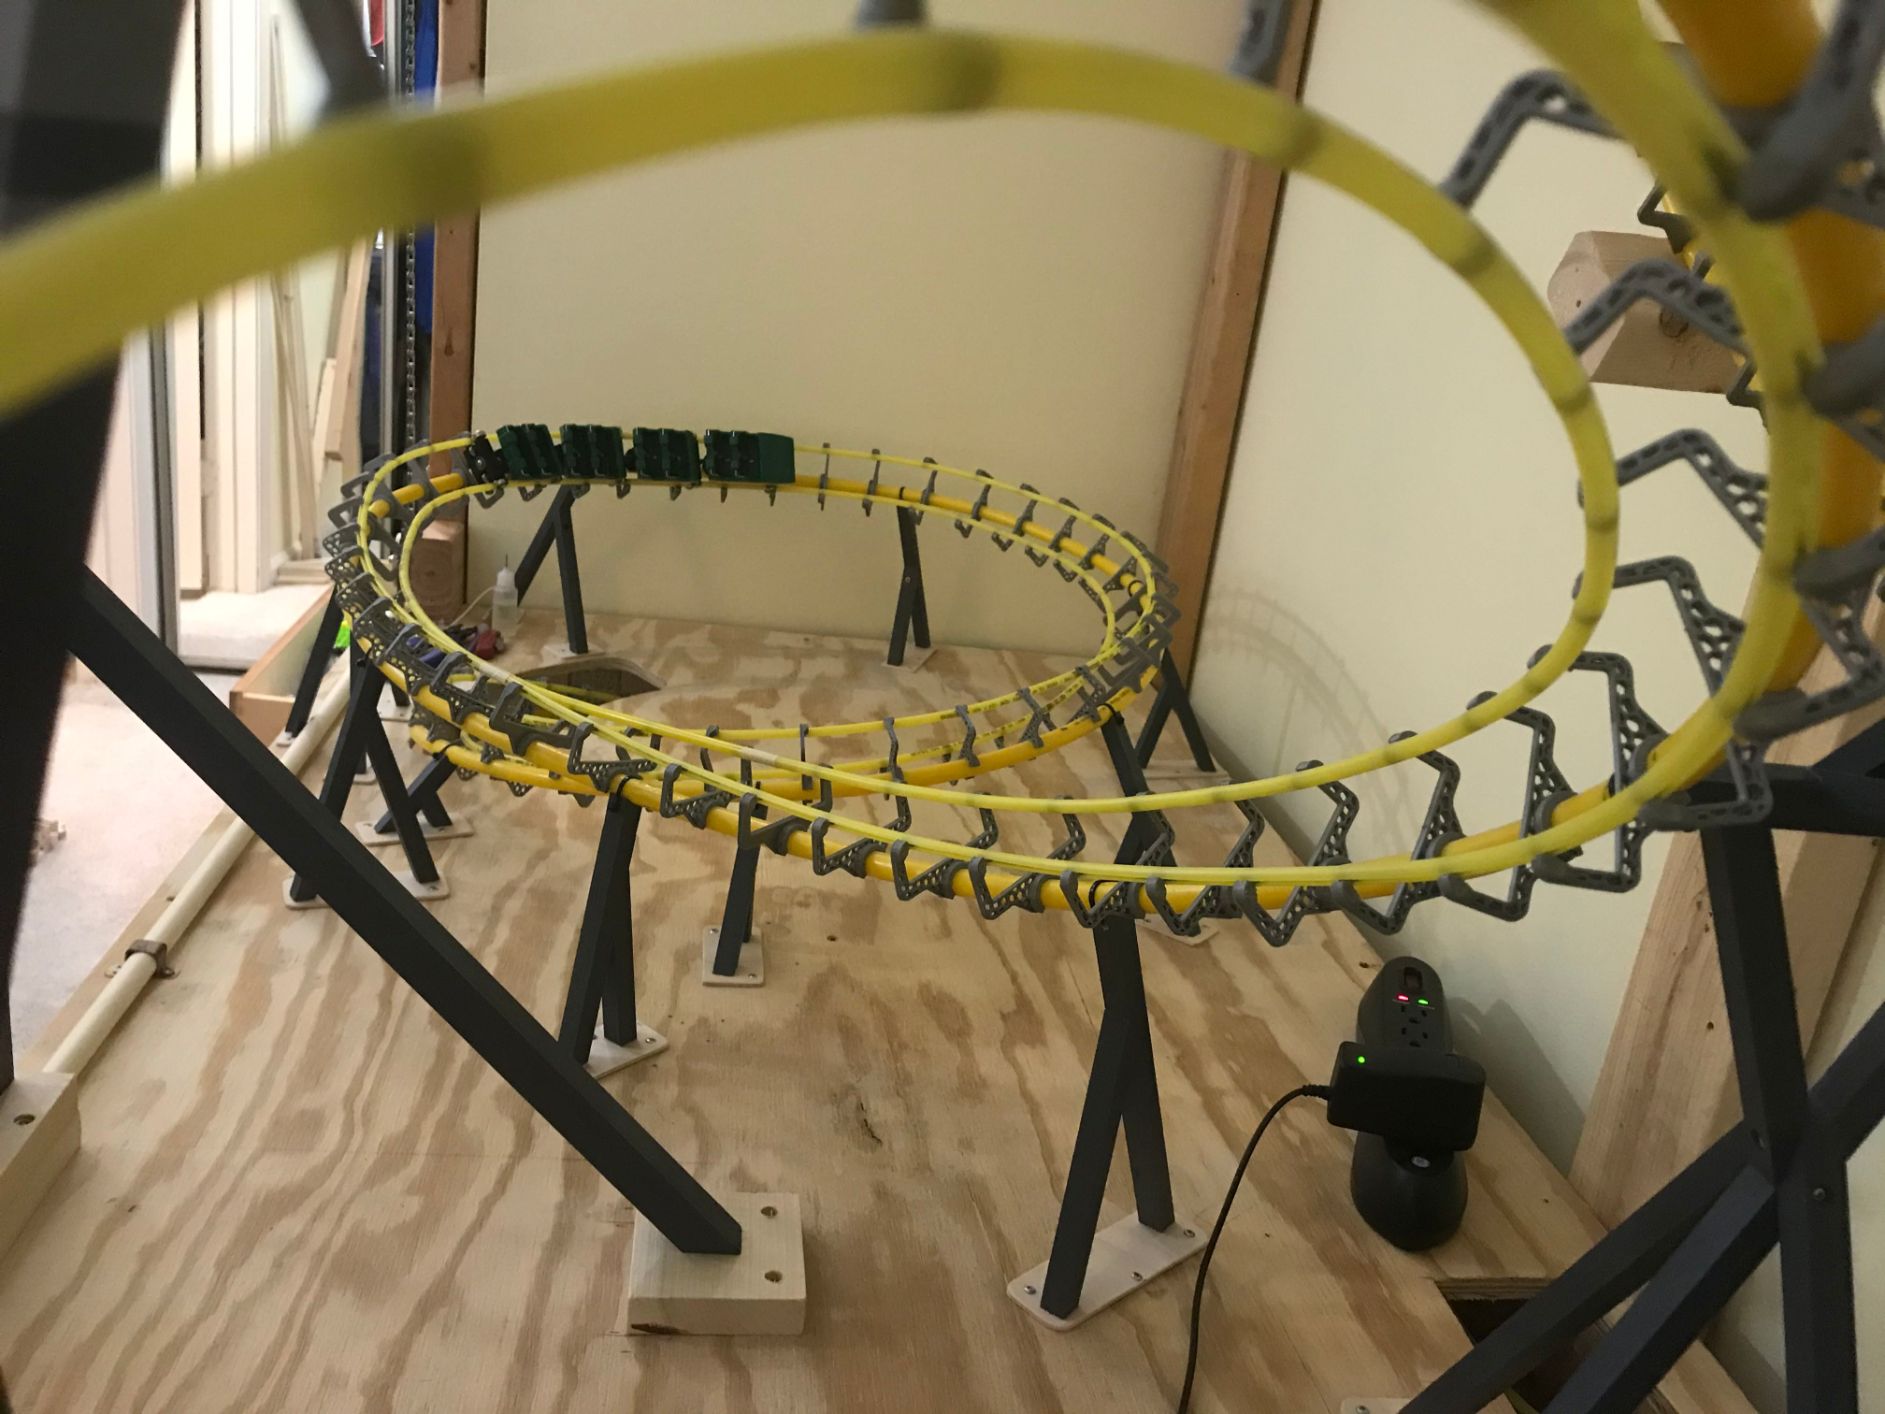
The track-ties are 3D printed from plastic filament, and the rails and spine of the track are made from a plastic tubing called polyethylene tubing.
This tubing comes in a translucent roll and can be found at most hardware stores; though for this model, I ordered several hundred feet of yellow tubing as a node to the Loch Ness Monster from Busch Gardens Williamsburg.
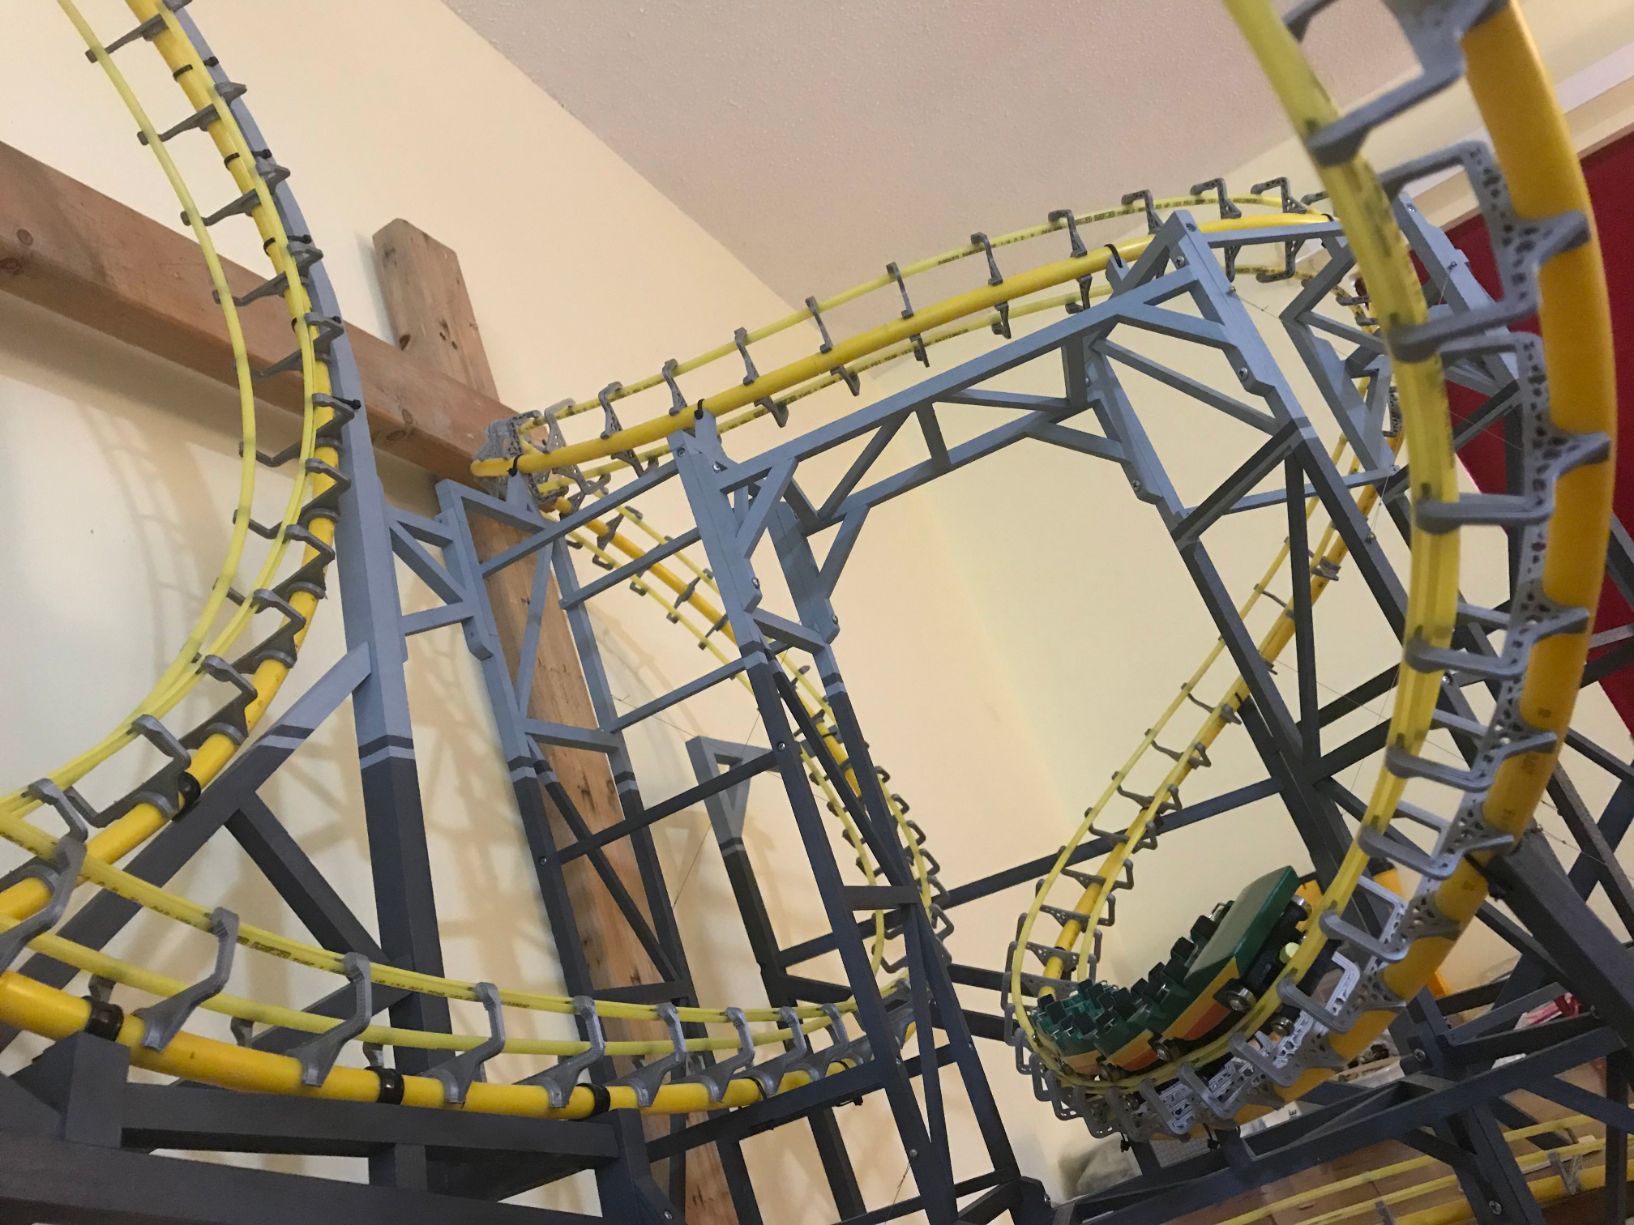
The supports are made of wood (dowel rods or ripped-down pieces of wood) and numerous little screws, glue, zip ties and paint to cover it all up.
What about the lift system?
My bicycle sacrificed some key parts for this chain lift system as I used the chain and rear cogs (cassette) from the bike. I cut a grove slightly wider than the width of the chain into the square lift-hill dowel rods to serve as a trough for the chain. I then lined the trough with a plastic strip to allow the chain to slide easily.
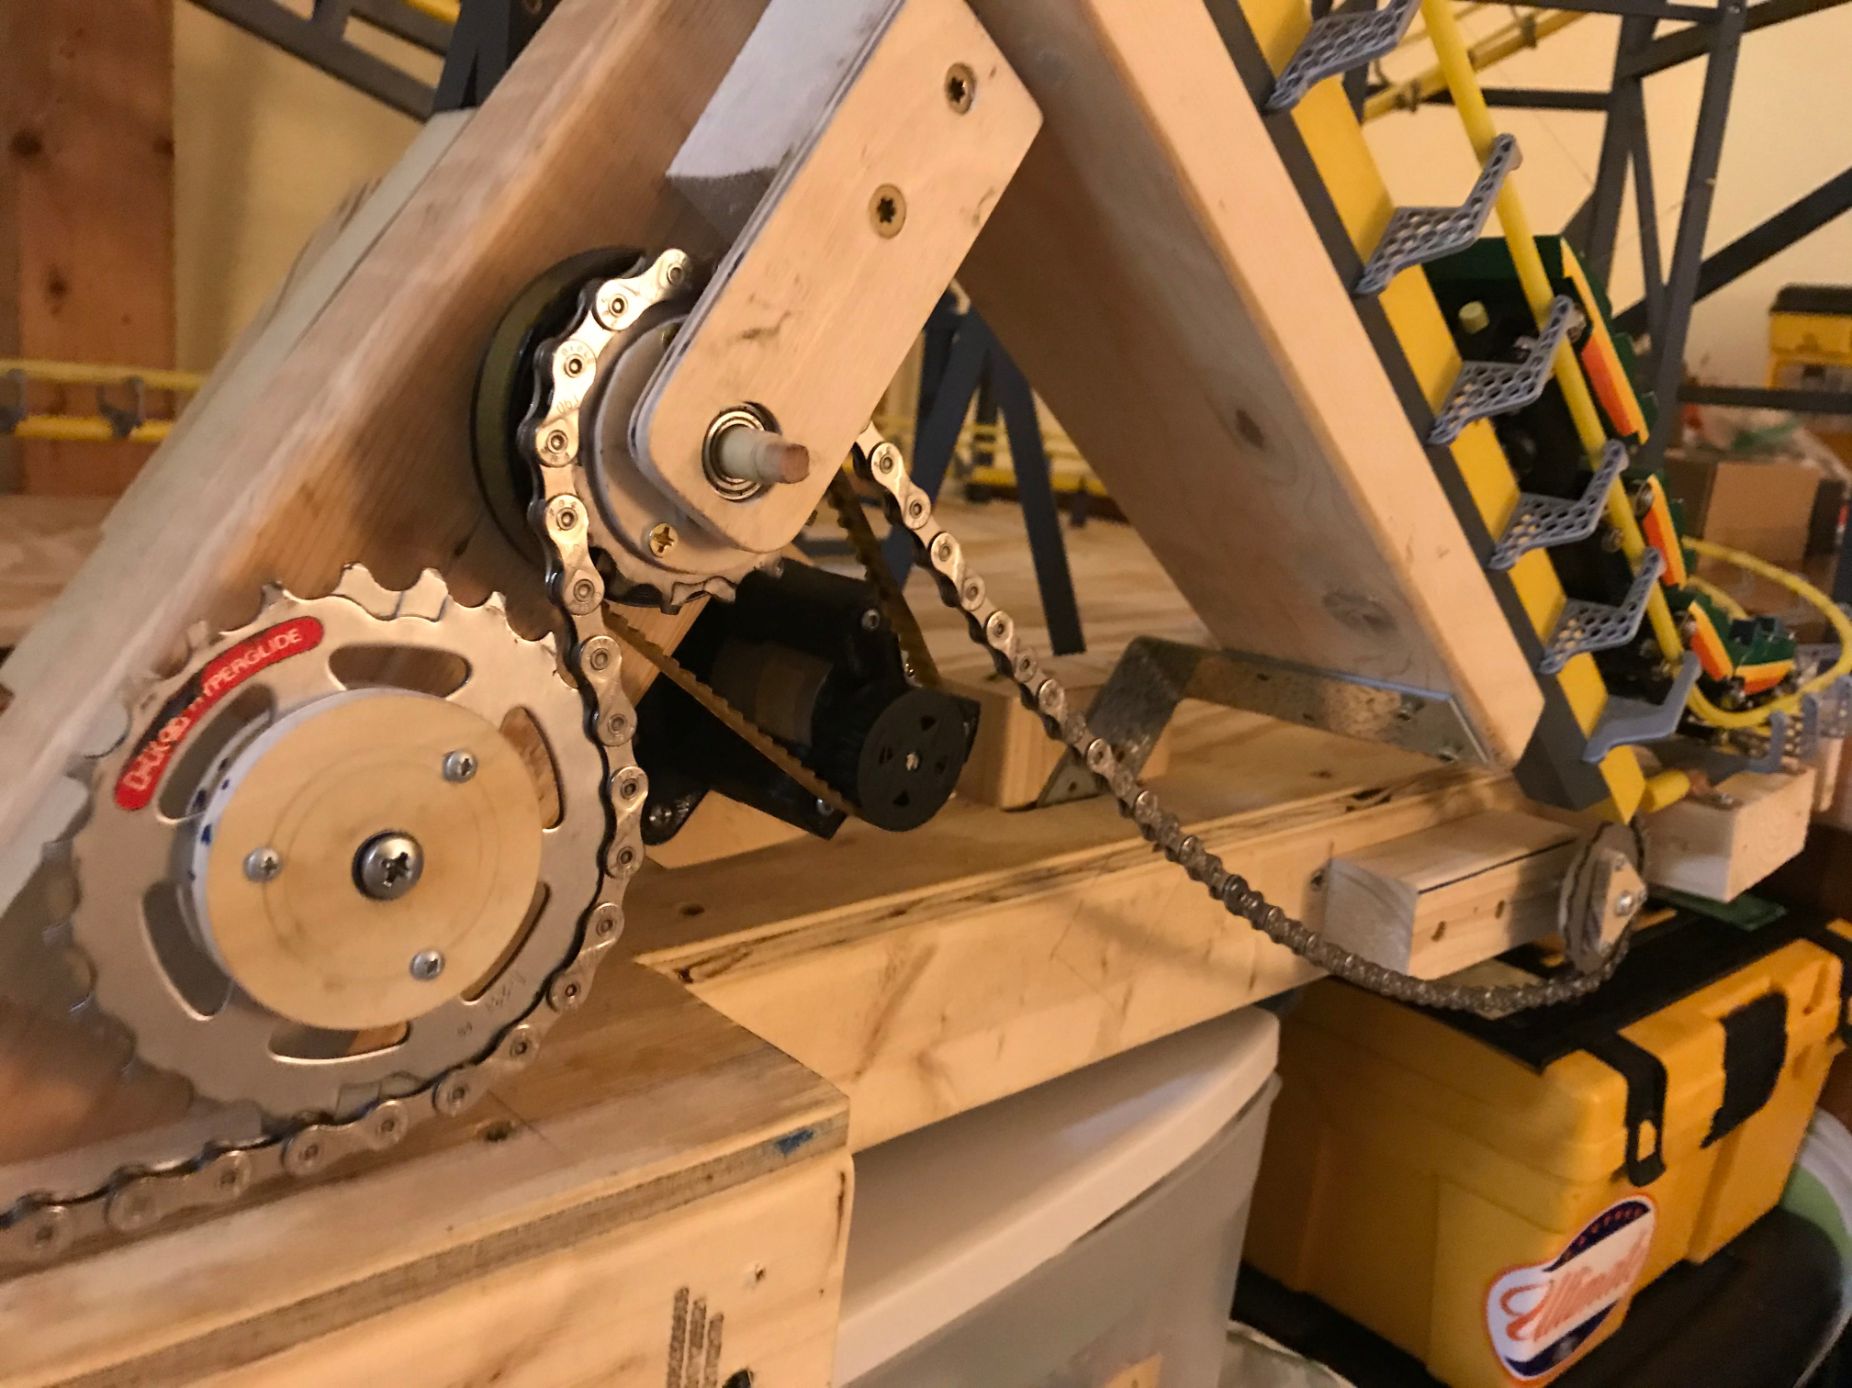
The chain is powered by a small servo motor and has been working consistently, unlike my bicycle which still lacks a chain and rear cassette.
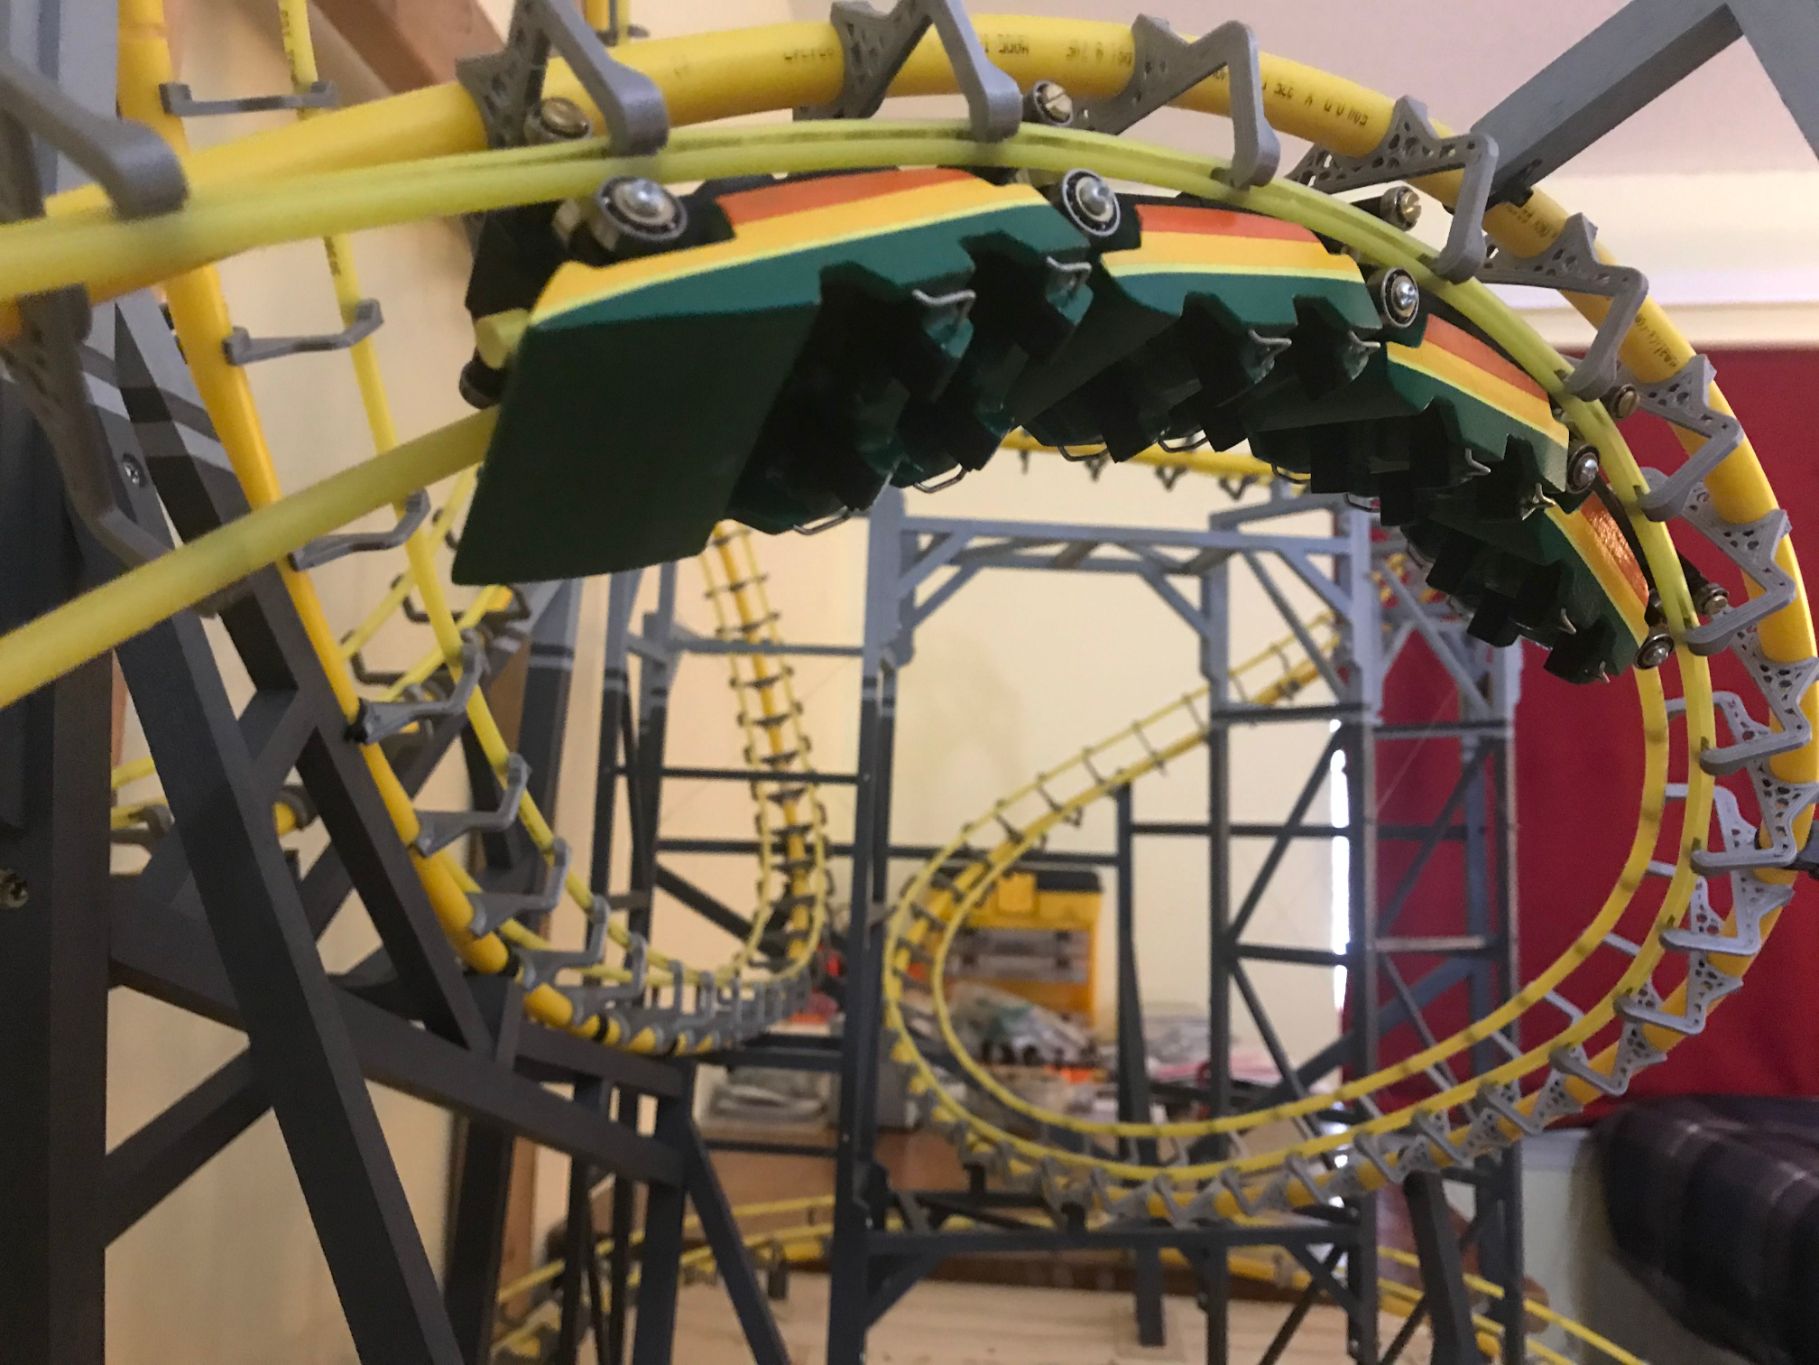
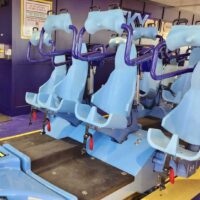
The trains?
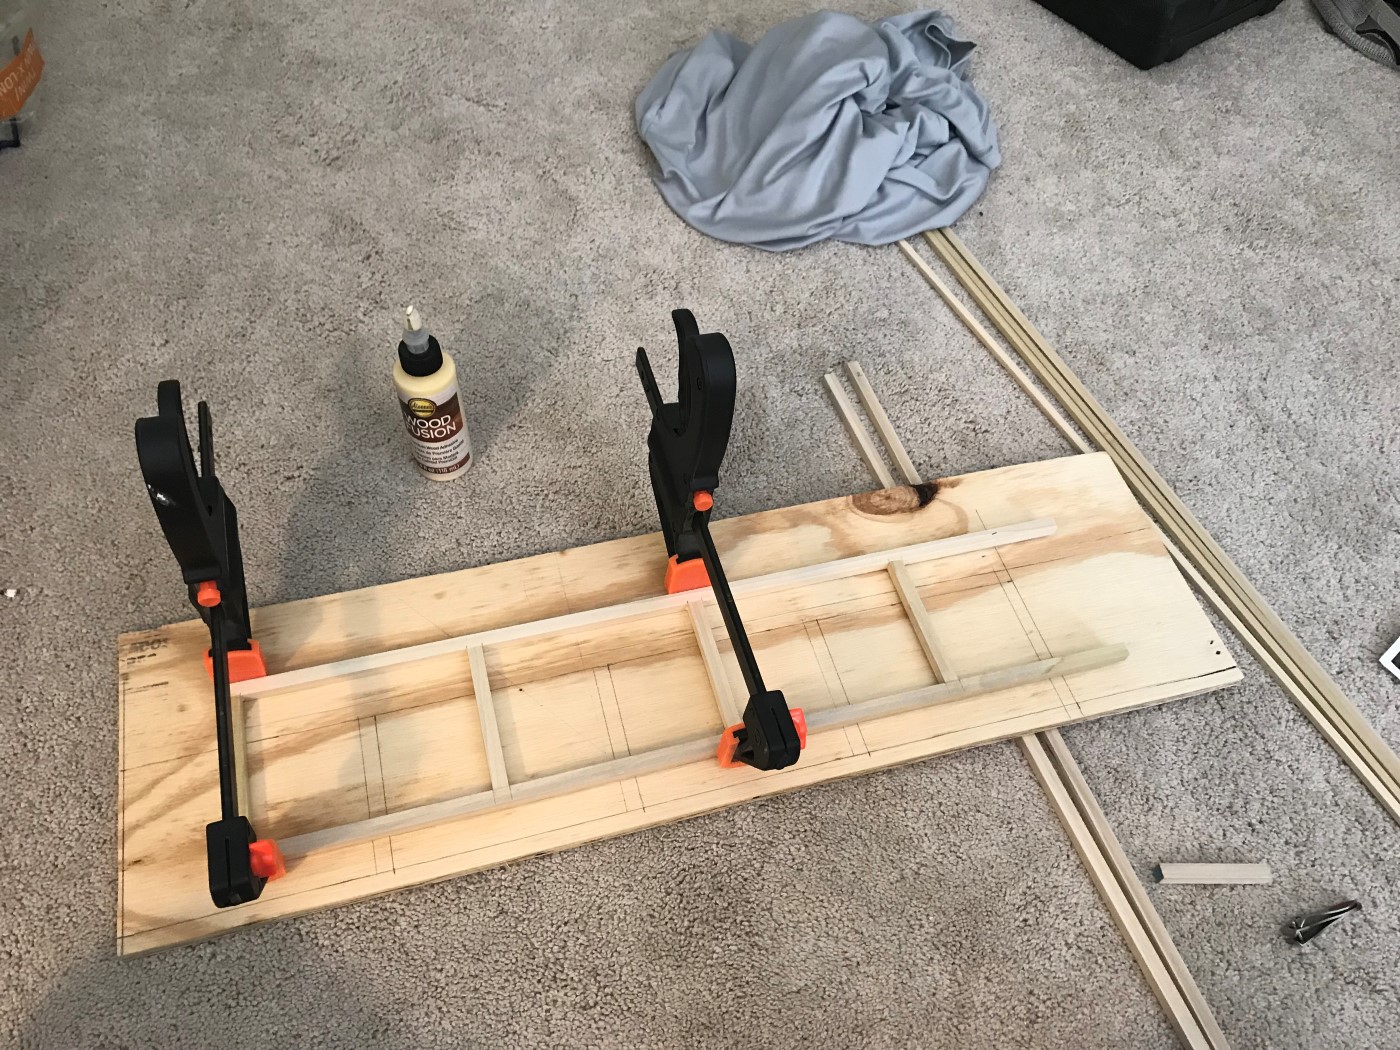
The train bodies are primarily made from 1/8” craft board, which I cut and glued together and filled in with wood putty.
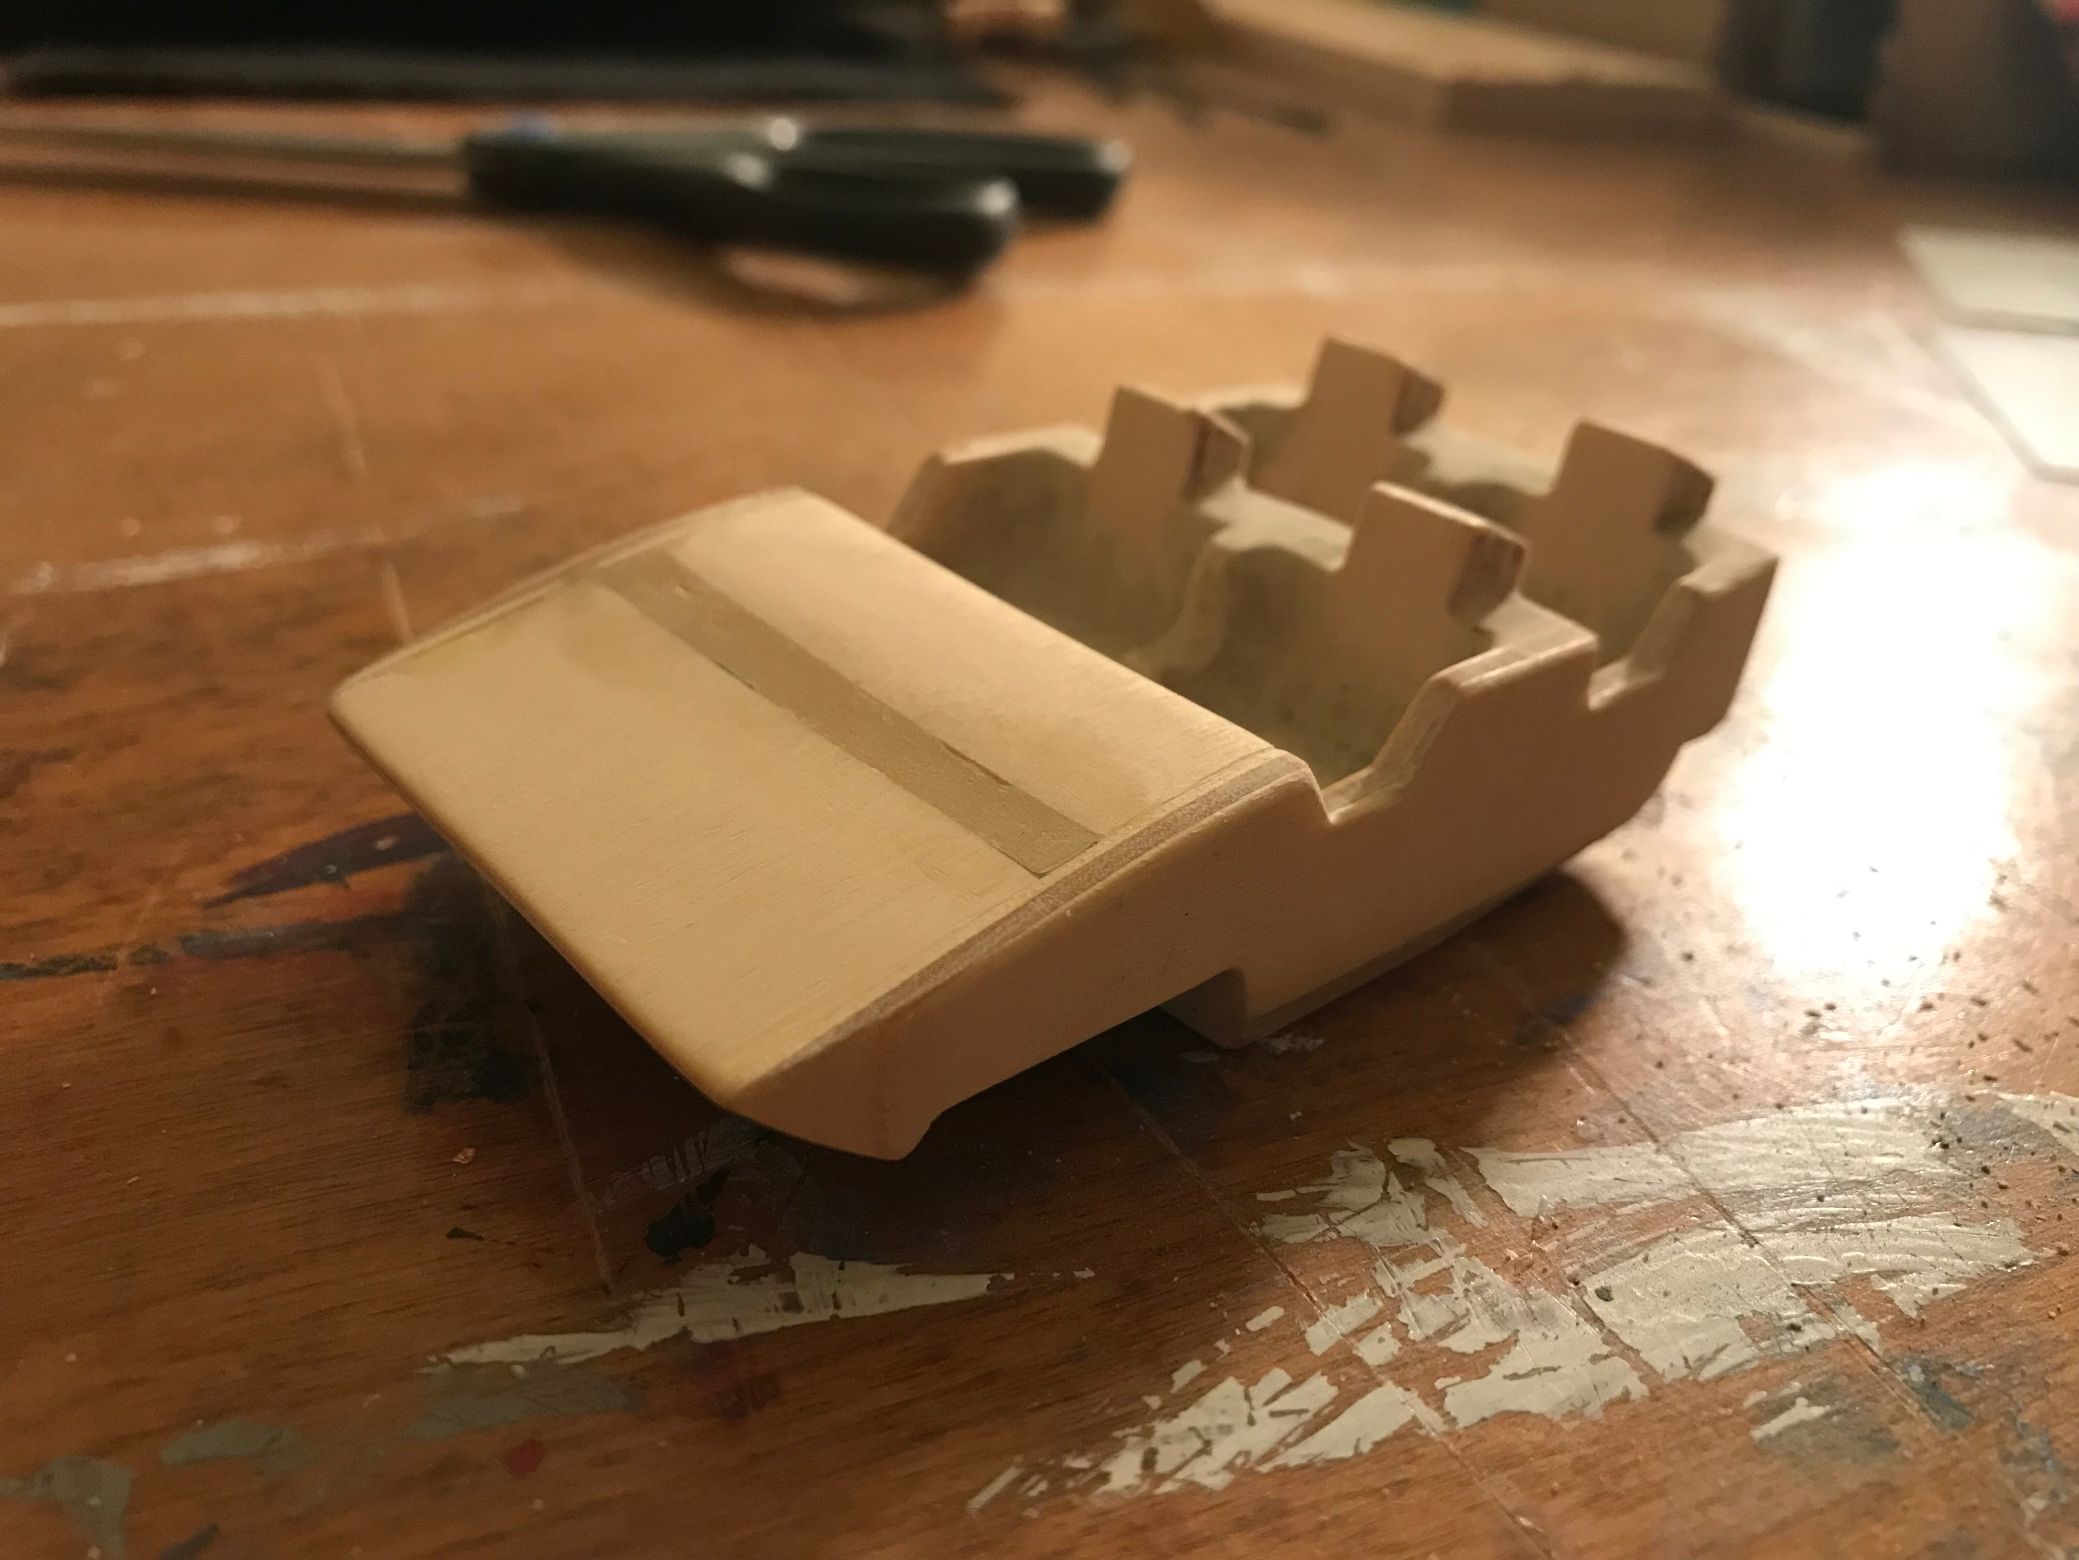

For the finishing touches, I painted the cars, sprayed them with a coat of clear gloss and added pieces of foam for seat cushions.
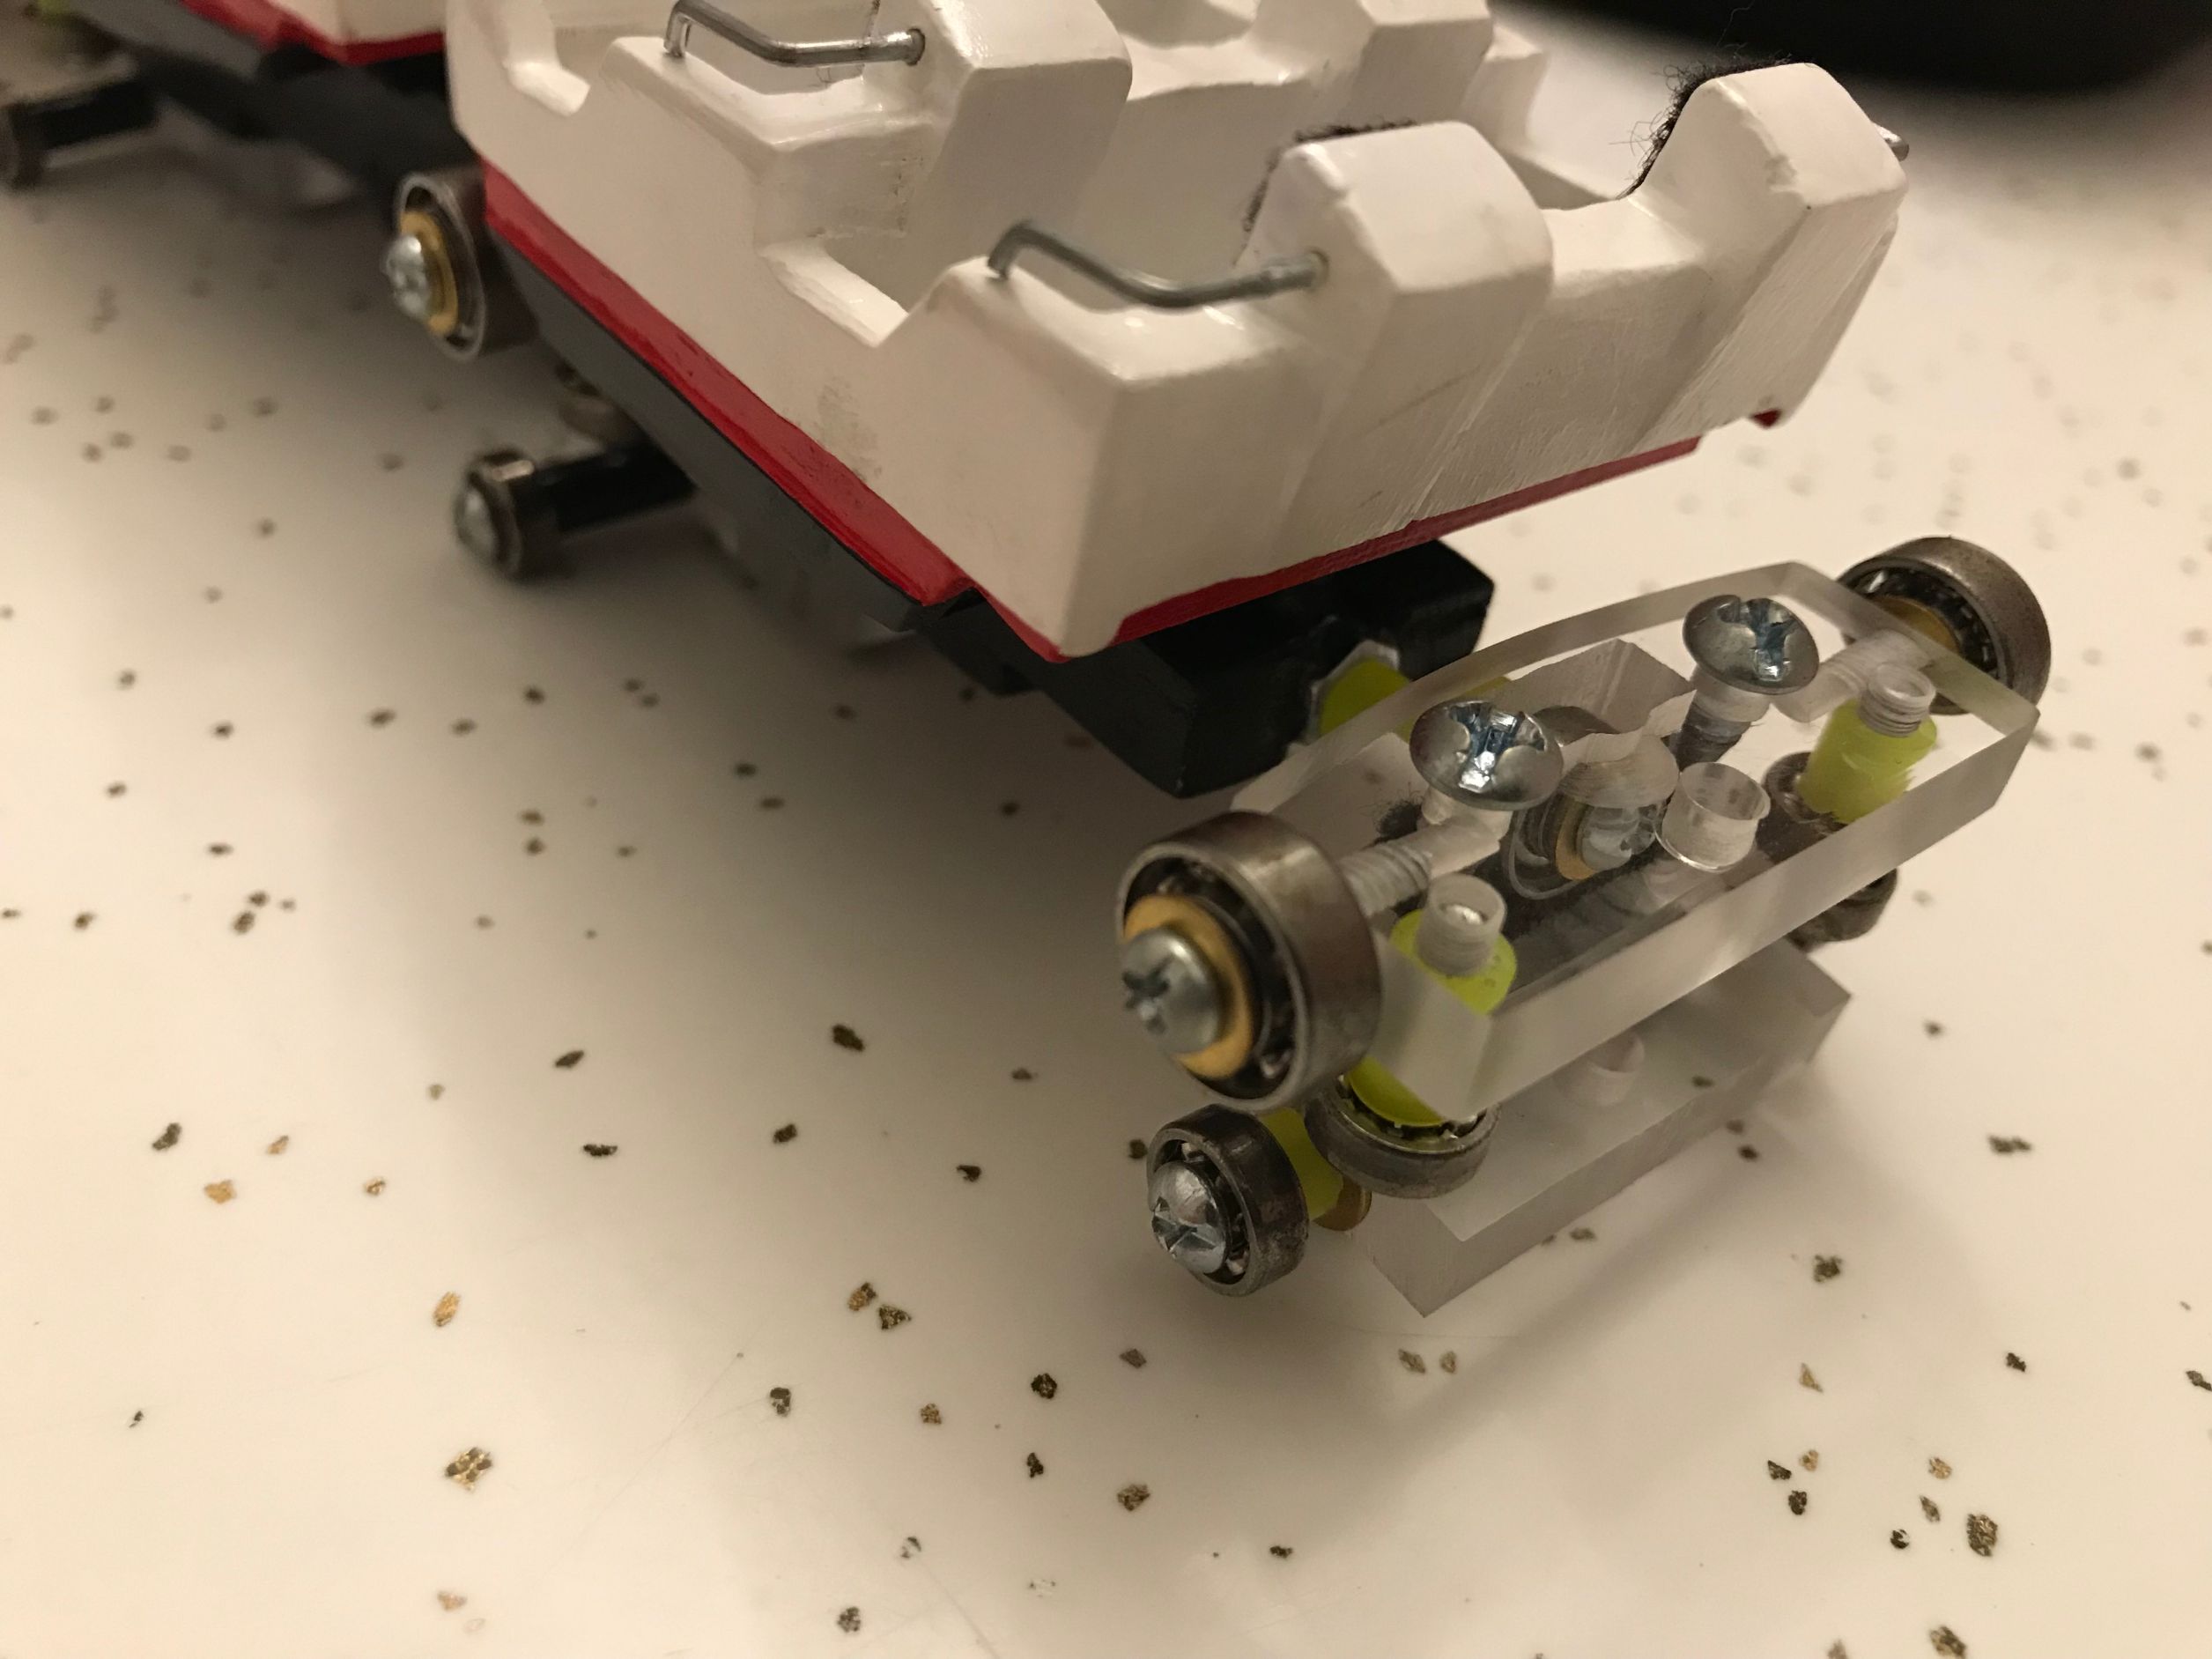

The base/chassis and the wheel assemblies are all printed from plastic and the wheels of the car are small bearings. These bearings and some of the universal joints used to connect the cars were all originally pulled off my remote-control car which, like my bike, it not yet running.
What is the track height and length?
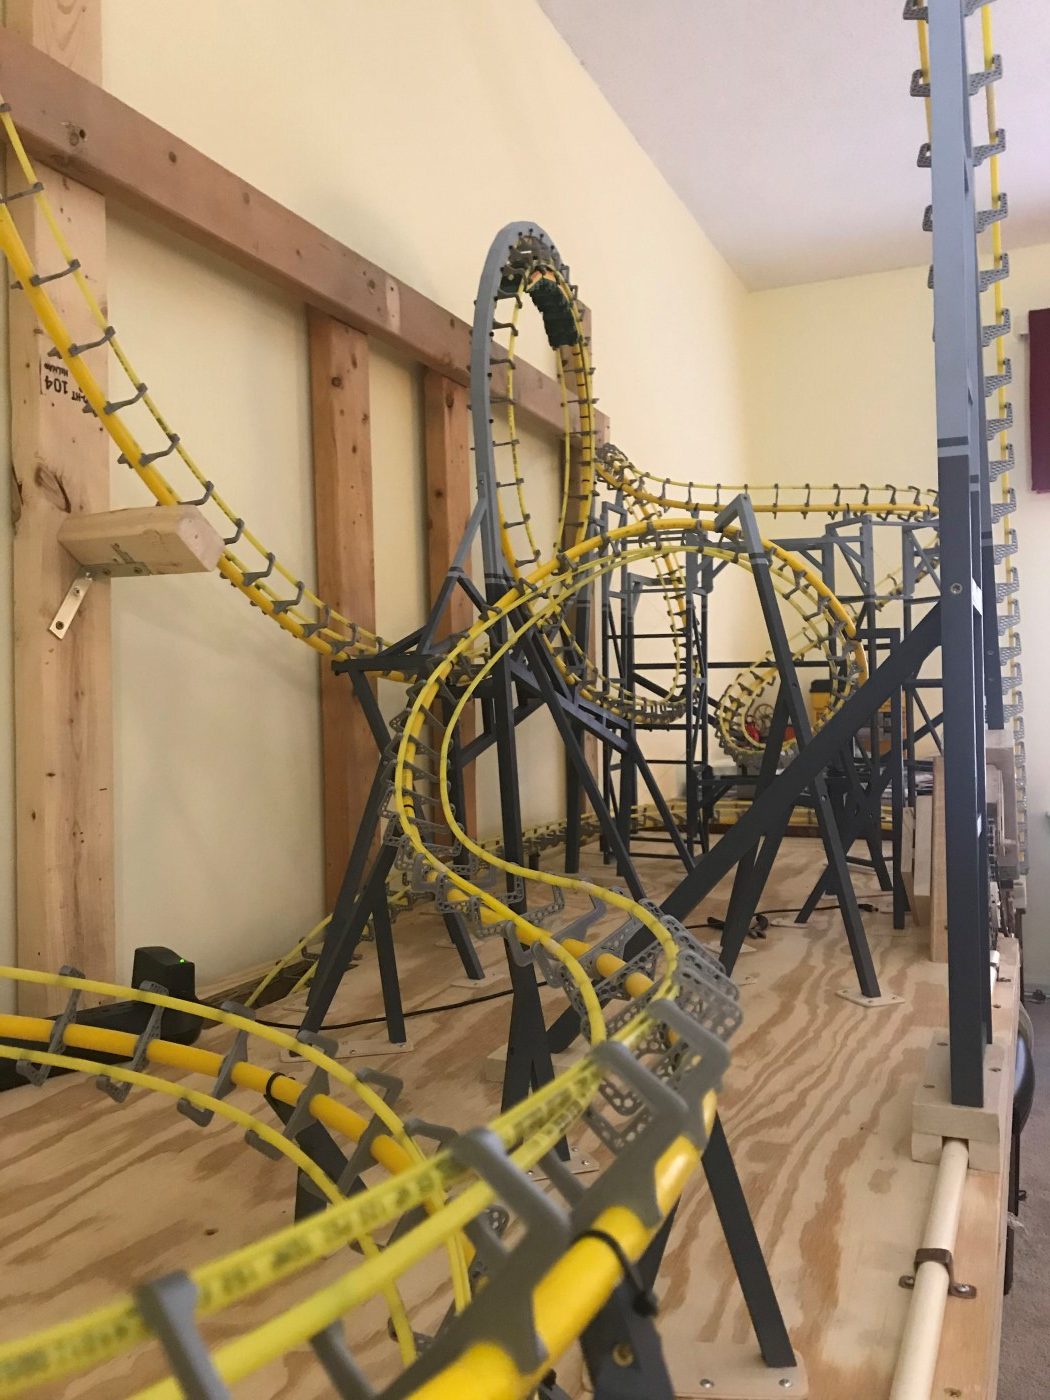
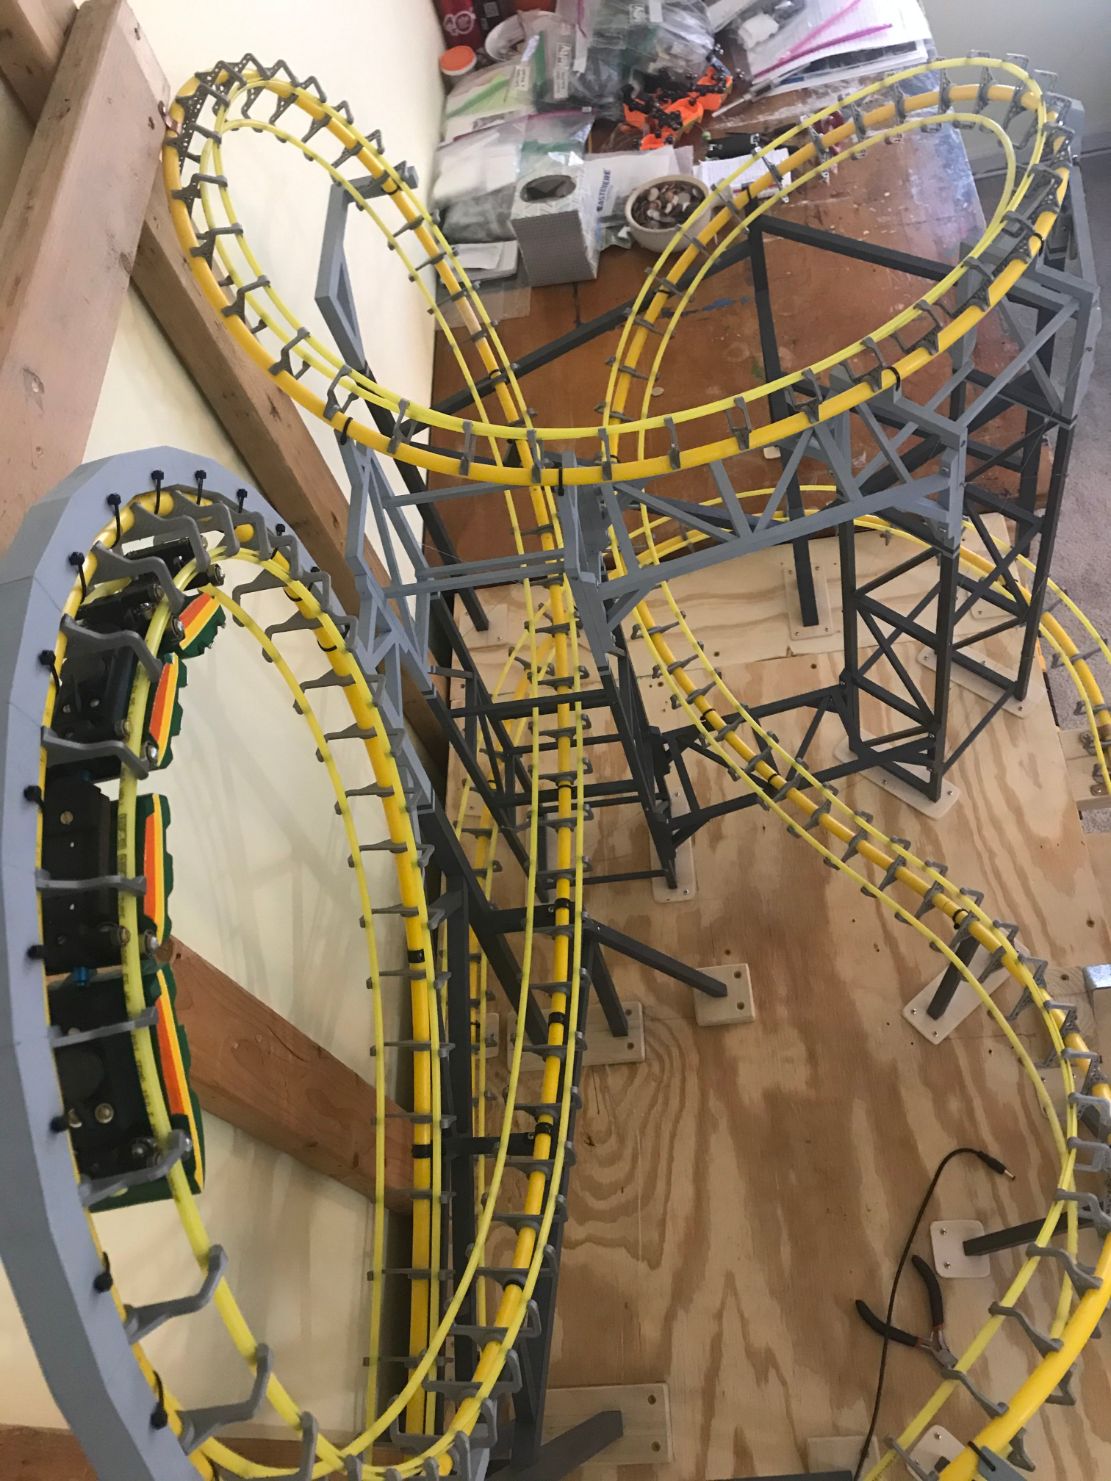
The top of the lift hill stands just over five feet from the top of the desk/platform and the track length is roughly 70 feet long.
What was the most challenging part of the project from design to completion?
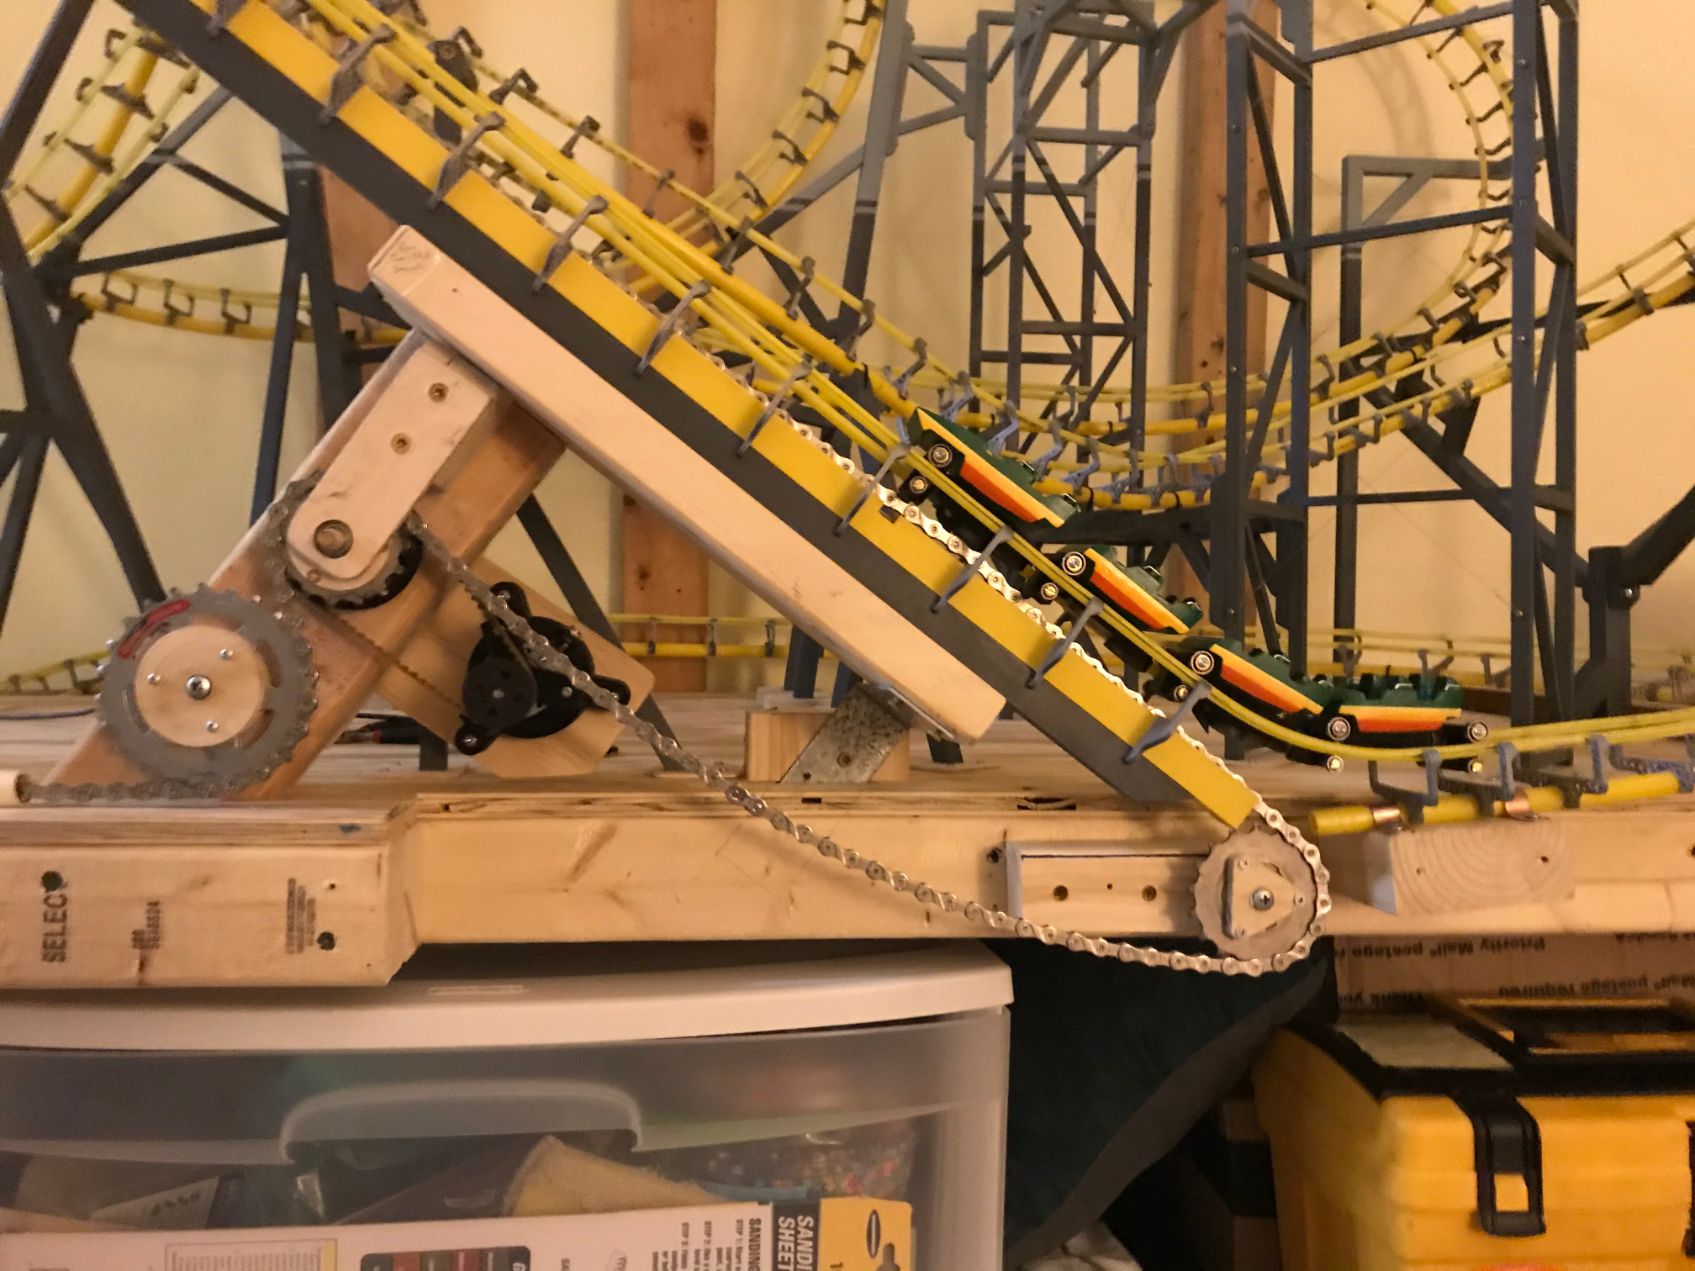 The two most-challenging parts of the roller coaster were the trains and chain lift. As one who had never designed a coaster train from scratch, it took a bit of trial and error to understand how the cars could articulate while also supporting each other. Getting the correct spacing in the wheels to ensure the most freedom of movement was also tricky. The lift was challenging because I was having difficulty getting the train to latch on and off the chain lift consistently. Eventually, I connected a magnet to the bottom of the car and creating a one-way latching system allowing the train to move up the lift but not down.

Once the design was finalized, how long did it take you to build the model?
The design and construction process has been somewhat intermingled, but the process has taken me about a year. Because I work full time, I mostly worked on this coaster over the weekends and some evenings.

Did the design change at all during assembly?
The design of the coaster did change somewhat, but the design of the cars has stayed mostly like the original hand-made cars. Various types of infills for the 3D-printed parts were tested, and the layout of the track changed a few times as some of the elements didn’t work as originally planned.
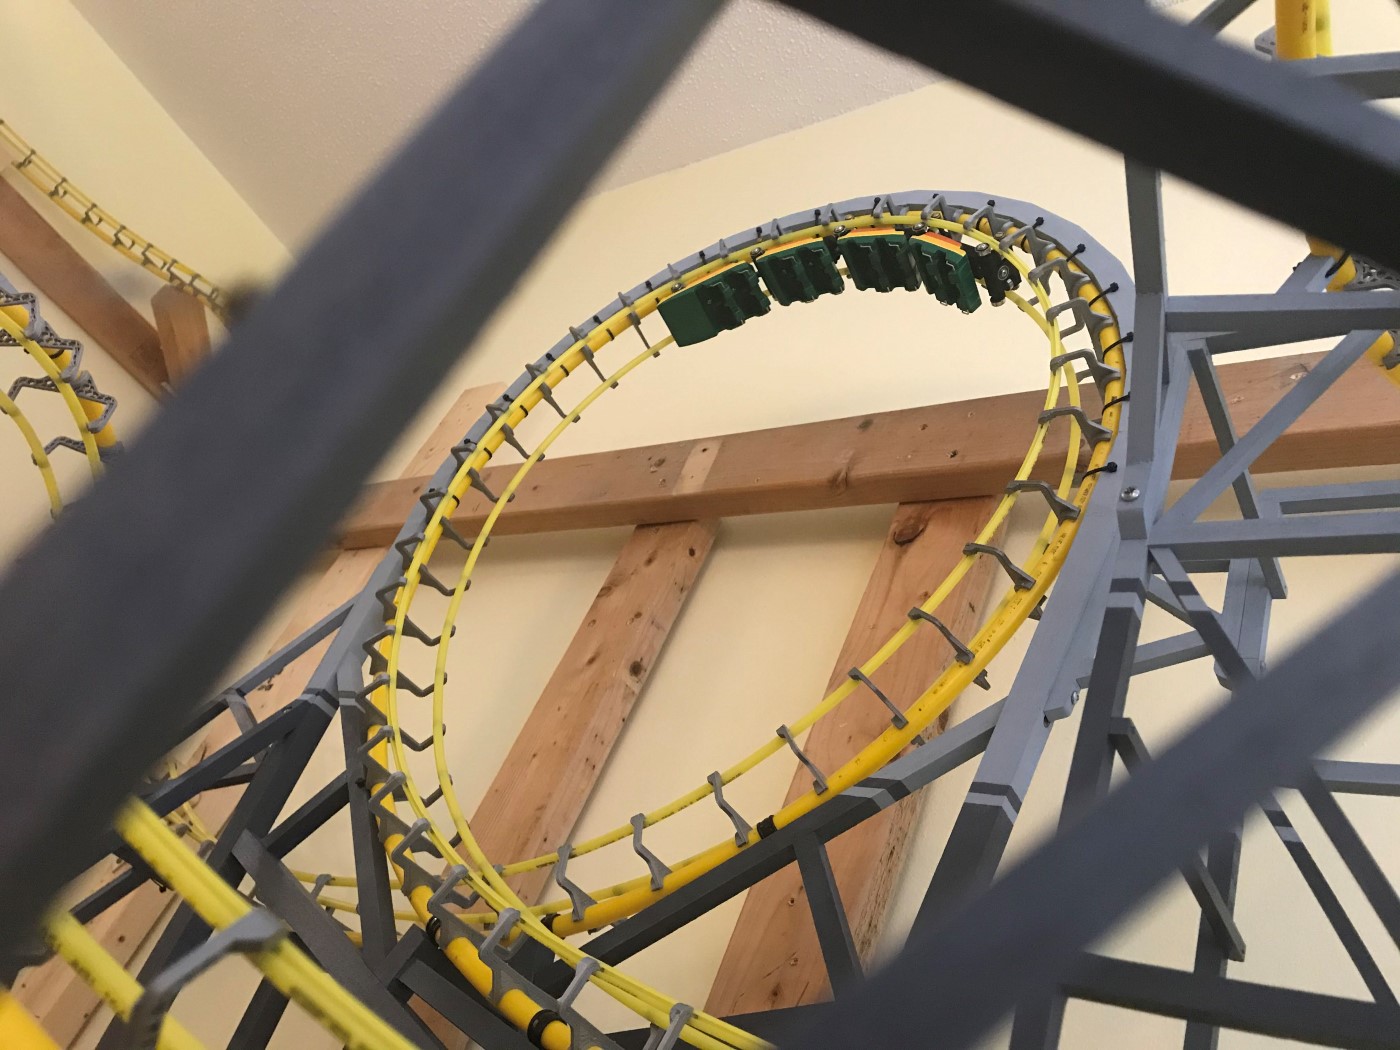
At first, I planned a large helix drop into a loop, but I found the trains lost quite a bit of speed, so I changed it to a straight drop into a loop.
Do you have another model planned or in the works?
After a couple finishing touches with this model, I do plan on making some more models. I’m a fan of Arrow Dynamics coasters and have been getting inspiration from some of their models that came into fruition and well as their proposed models. The next coaster, or at least train, I would like to design would be their suspended coaster. I’ve started designing a suspended track and hope to make a small suspended Big Bad Wolf train than can work and sit alongside the Loch Ness Monster train. I also thought the Arrowbatic concept and Pipeline coaster were quite interesting, so I may give those a whirl.

What advice would you give to someone who wants to build a similar working model like this?
 Patience is key and always look for fun items in the hardware stores that could have a multipurpose, especially for models. Now is a better time than ever to start creating your own designs with the availability of basic CAD programs and with 3D printers becoming less expensive. It takes time and patience, but once your creations work, it is very rewarding.
Finally, what are some of your favorite roller coasters?
I’m a huge Intamin fan, so I gotta say Millennium Force at Cedar Point. In recent years I’ve also quite enjoyed some RMCs like Lightning Rod at Dollywood and Outlaw Run at Silver Dollar City. One other coaster I’d like to give an honorable mention to is Mr. Freeze at Six Flags Over Texas, which was my first launched coaster and always brings a smile to my face.
This video features some off-ride footage of the model taken in
We’d like to thank Jonnie for taking time out of his busy schedule to chat with us. We can’t wait to see his next project!

Johnnie…I knew you and your family from your time at the Cuba Library…Linda Poelma shared this article with me…because I write for the Cuba Patriot Newspaper….would love to do a story about you and your unique hobby! I can credit this article for much of it…but would ask how you got from Africa to roller coasters!
Would love to see your OnShape models